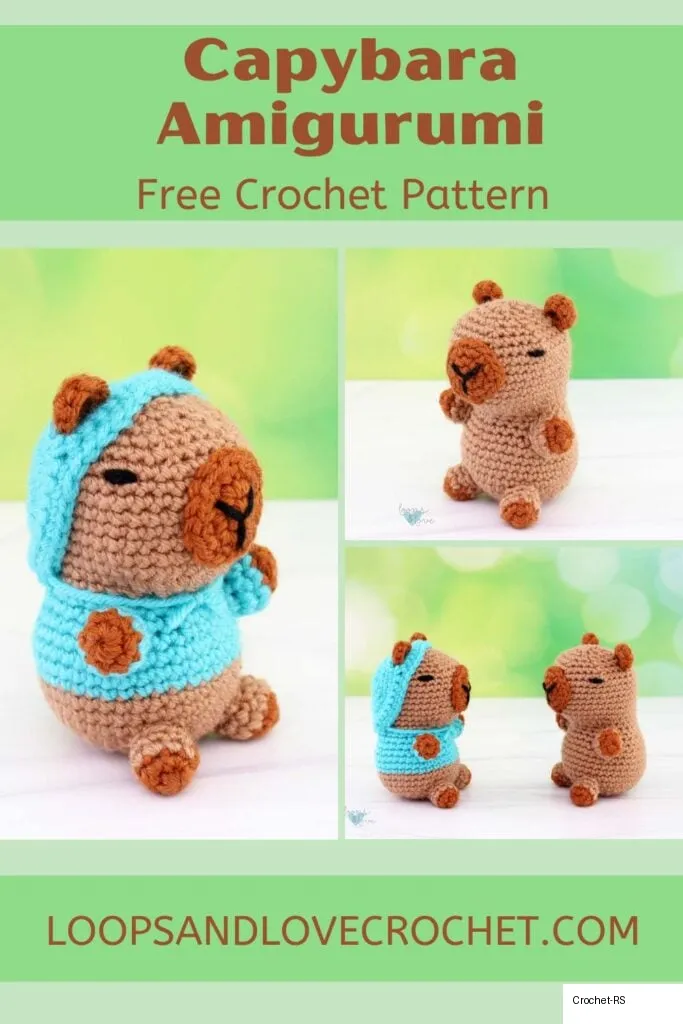
Capybara Amigurumi Pattern (With Optional Hoodie!)
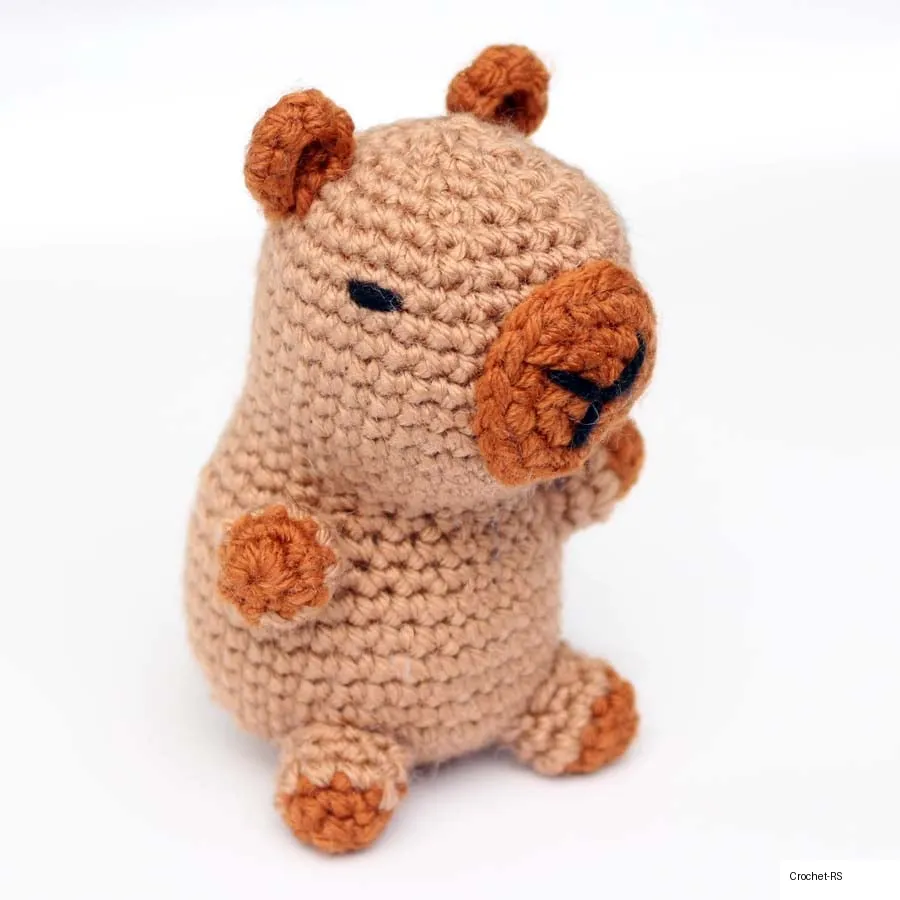
This capybara amigurumi is a fun and easy project with two adorable options to choose from. You can make your capybara in a cozy hoodie or keep it classic without — both versions are included in the pattern below.
You’ll love that this capybara amigurumi crochet pattern is worked in simple stitches and is a great project for confident beginners or intermediate crocheters. The body is made in one piece, the legs, ears, and snout (and optional hood) are worked up separately and sewn on.
Materials Needed
- Worsted weight (#4) yarn – Approximately 80-90 yds in total. Lighter brown/beige color and 5-10 yds in a darker brown. For the hooded version, approx 20 yds of an accent color. A small amount of black yarn is needed for facial features. WeCrochet Brava Worsted was used here.
- 3.5mm crochet hook
- Stuffing – any fiber-based stuffing.
- Yarn needle – for sewing pieces together and weaving in ends.
- Scissors – for cutting yarn.
Pattern Details & Notes
Stitches Used
- Ch – chain
- Sl St – slip stitch
- SC – single crochet
- INV DEC – invisible single crochet decrease
Size & Pattern Notes
- Size: When finished, this capybara measures approx 4.5” tall from head to feet with legs hanging straight.
- Hoodie or No Hoodie Versions: Both are worked up the same except for color changes on the body/legs. The hood is worked separately and sewn on.
- Continuous Rounds: Worked up in continuous rounds without joining. Use a stitch marker.
Step-by-Step Instructions
1. Snout
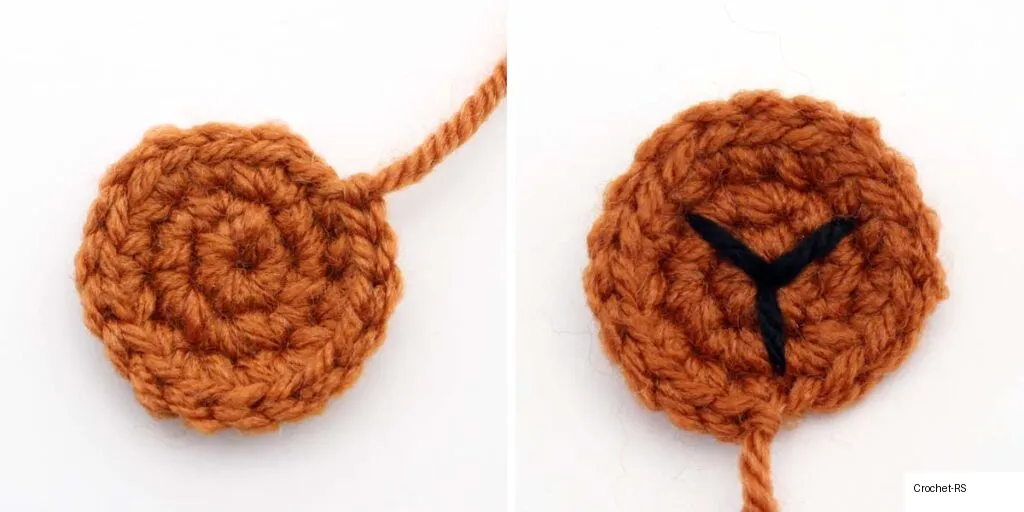
- Round 1: In dark brown, magic circle, ch 1, make 6 SC into ring (6)
- Round 2: 2 SC in each st around (12)
- Round 3: *2 SC in first st, SC in next st, repeat from * around (18)
Fasten off, leave a long enough tail for sewing. Using black yarn, sew a “Y” shape for the snout. Start at the center and make two diagonal stitches up, one straight down. Knot at back and set aside.
2. Body and Head
- Round 1: In light brown, magic circle, ch 1, make 6 SC into ring (6)
- Round 2: 2 SC in each st around (12)
- Round 3: *2 SC in first st, SC in next st, repeat from * around (18)
- Round 4: *2 SC in first st, SC in next 2 sts, repeat from * around (24)
- Round 5: *2 SC in first st, SC in next 3 sts, repeat from * around (30)
- Round 6: *2 SC in first st, SC in next 4 sts, repeat from * around (36)
- Rounds 7-12: SC in each st around (36)
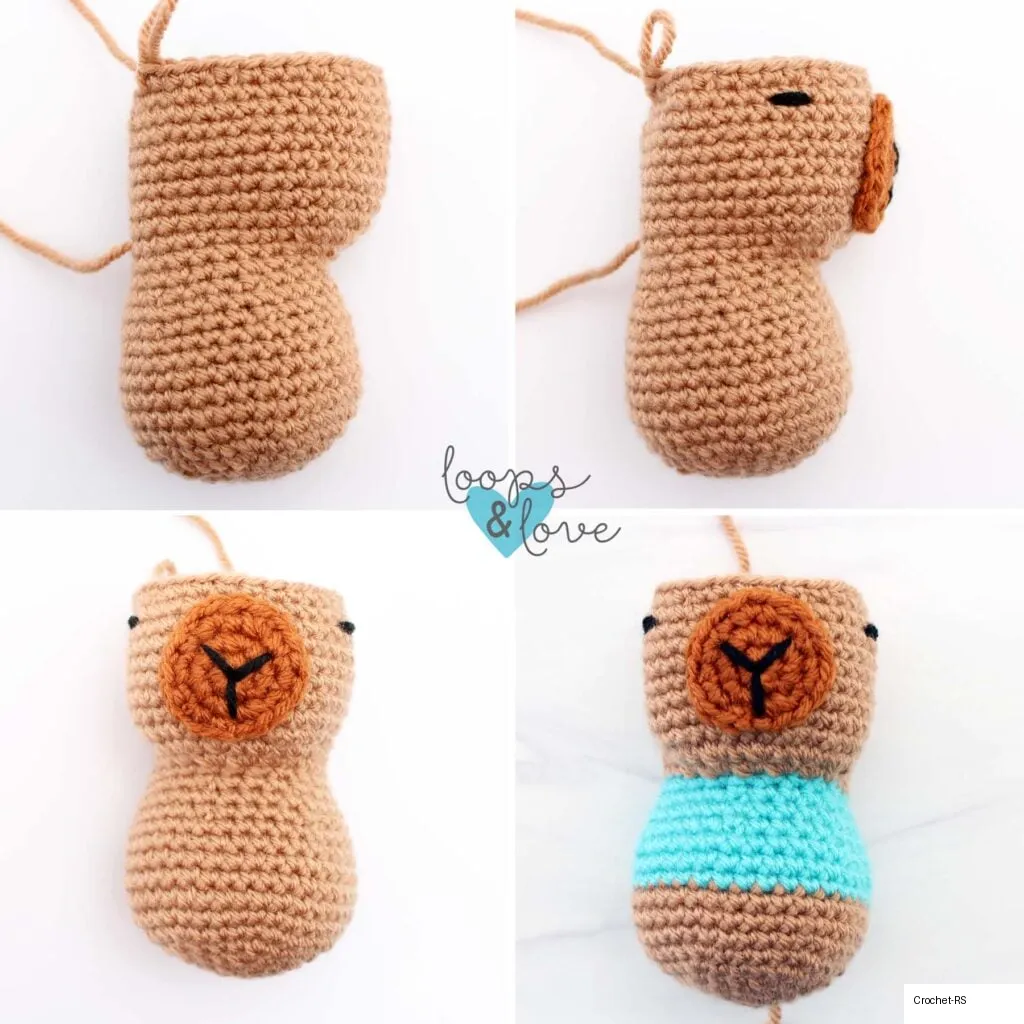
*If making hoodie version: work rounds 10-16 in hoodie color, then change back to light brown.
- Round 13: *INV DEC, SC in next 4 sts, repeat from * around (30)
- Round 14: SC in each st around (30)
- Round 15: *INV DEC, SC in next 3 sts, repeat from * around (24)
- Round 16: SC in each st around (24)
The body section is complete. Stuff lower body. Next rounds form the head.
- Round 17: SC in first 9 sts, 2 SC in next 6 sts, SC last 9 sts (30)
- Round 18: SC in first 9 sts, *2 SC in next, SC in next, repeat from * 5 more times, SC last 9 (36)
- Rounds 19-26: SC in each st around (36)
- Round 27: *INV DEC, SC in next 4 sts, repeat from * around (30)
Facial Features
With front of face towards you, position snout in center, top one round down from top stitches. Sew it in place. The eyes are made by making a stitch of black yarn about 3 stitches wide between rounds 25 and 26. (Start eye in 4th stitch away from edge of snout).
Finishing Head
- Round 28: *INV DEC, SC in next 3 sts, repeat from * around (24)
- Round 29: *INV DEC, SC in next 2 sts, repeat from * around (18)
Make sure to add enough stuffing.
- Round 30: *INV DEC, SC in next st, repeat from * around (12)
- Round 31: *INV DEC around (6)
Fasten off, sew top closed.
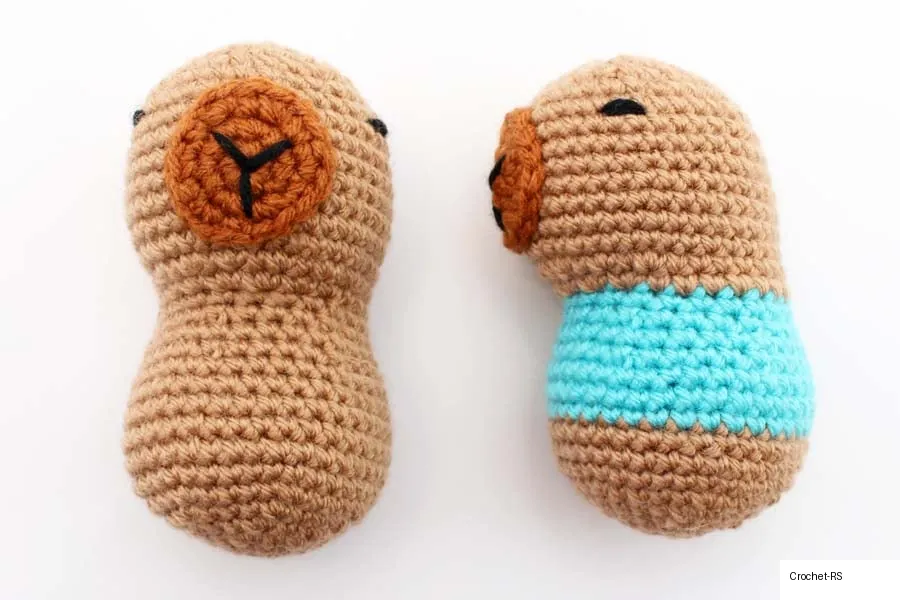
3. Ears (Make 2)
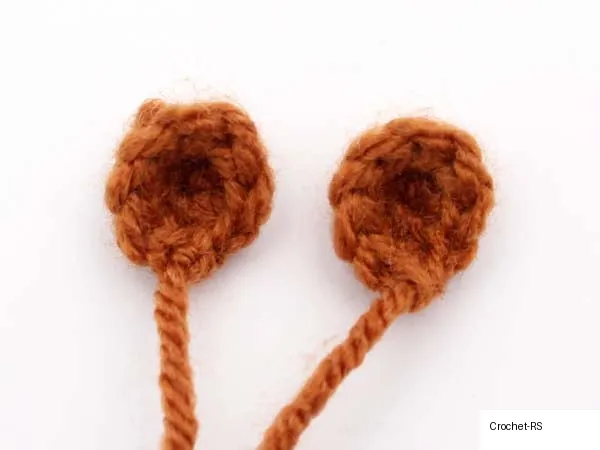
- Round 1: In darker brown, magic circle, ch 1, make 6 SC into ring (6)
- Round 2: *2 SC in first st, SC in next 2 sts, repeat from * around (8)
Fasten off with a slip stitch. Leave a tail for sewing. Set aside.
4. Arms and Legs (Make 4)
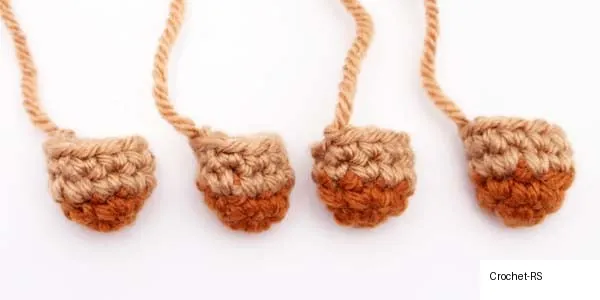
- Round 1: In darker brown, magic circle, ch 1, make 6 SC into ring (6)
- Round 2: *2 SC in first st, SC in next st, repeat from * around (9)
- Change color to light brown (*If making hoodie version, change to hoodie color after round 2 for two of the arms/legs only).
- Rounds 3-4: SC in each st around (9)
Fasten off with a slip stitch. Leave a tail for sewing.
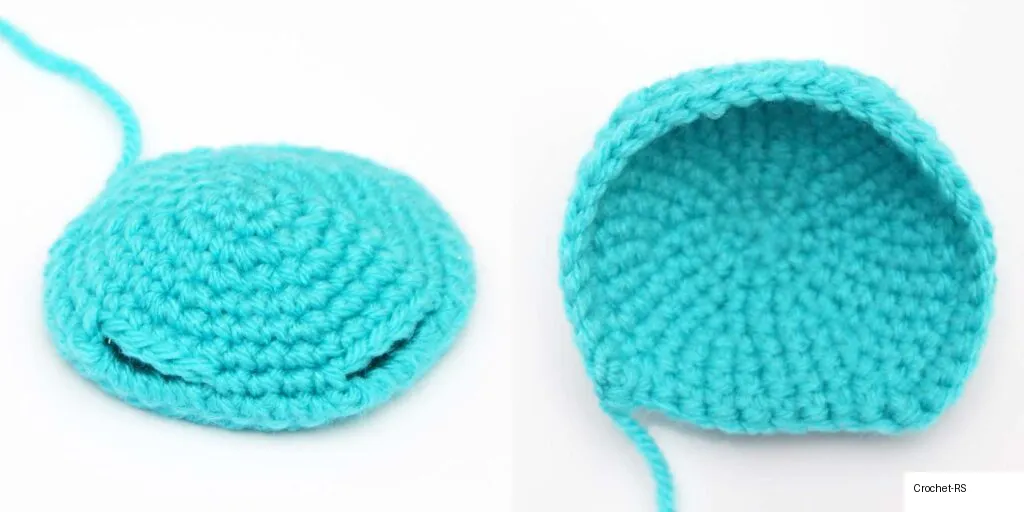
5. Hood (Optional)
- Round 1: In hoodie color, magic circle, ch 1, make 6 SC into ring (6)
- Round 2: 2 SC in each st around (12)
- Round 3: *2 SC in first st, SC in next st, repeat from * around (18)
- Round 4: *2 SC in first st, SC in next 2 sts, repeat from * around (24)
- Round 5: *2 SC in first st, SC in next 3 sts, repeat from * around (30)
- Round 6: *2 SC in first st, SC in next 4 sts, repeat from * around (36)
- Round 7: SC in each st around (36)
- Round 8: SC in first 12 sts, ch 5, skip 4, SC next 4 sts, ch 5, skip 4 sts, SC in last 9 sts, ch 1, turn (25 SC + 10 ch) *Last 3 sts unworked.
- Round 9: SC in first 9 sts, 4 SC in ch space, SC next 4 sts, 4 SC in ch space, SC last 9 sts (30) *Last 6 sts unworked.
- Round 10: SC in each stitch across, then continue to SC in next 2 sts down the side of straight edge, SC in each of the 6 previously unworked stitches across, then SC in next 2 stitches back up edge on other side. Join with slip stitch. (40)
Fasten off, weave in ends. Leave a long tail for sewing onto capybara.
6. Assembly
- Sew on the Ears: Place ears towards the back of the head, starting approx 4 stitches from each eye and one round up. (Test placement with hood first if using).
- Sew on the Legs: Sew two legs to the bottom/front of the body for stability. For pictured capybara, they are sewn in rounds 4-6 up from bottom.
- Sew on Arms: One on each side of body, 1-2 rounds below the head. (If using hoodie, the legs are brown and arms are accent color).
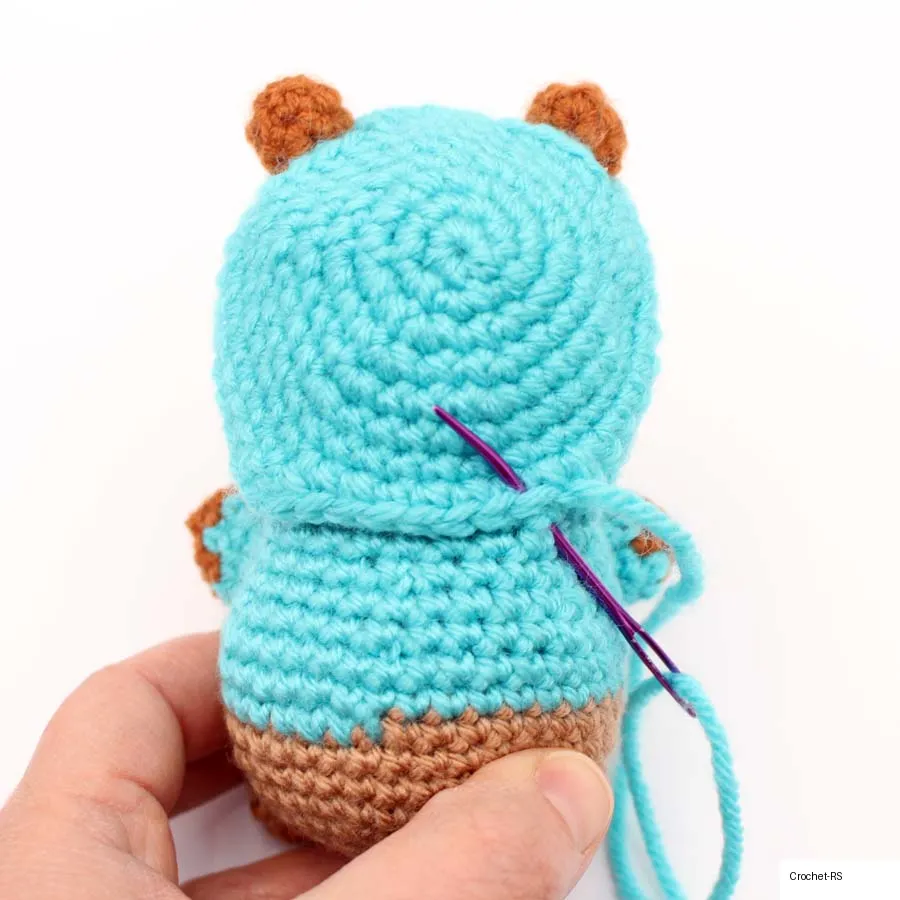
- Sew on the hood (optional): Put hood onto head with ears through openings. Sew along stitches at the bottom of hood at the back of capybara, lined up in the accent-colored stitches of round 16. Sew in and out of each stitch. Optional – create a tie string by passing a strand of yarn through hood ends and tying a knot.
You are all finished your cute Capybara Amigurumi! I hope you love how it turned out!
[wprm-recipe id=”749″]