Mini Elephant Amigurumi Pattern
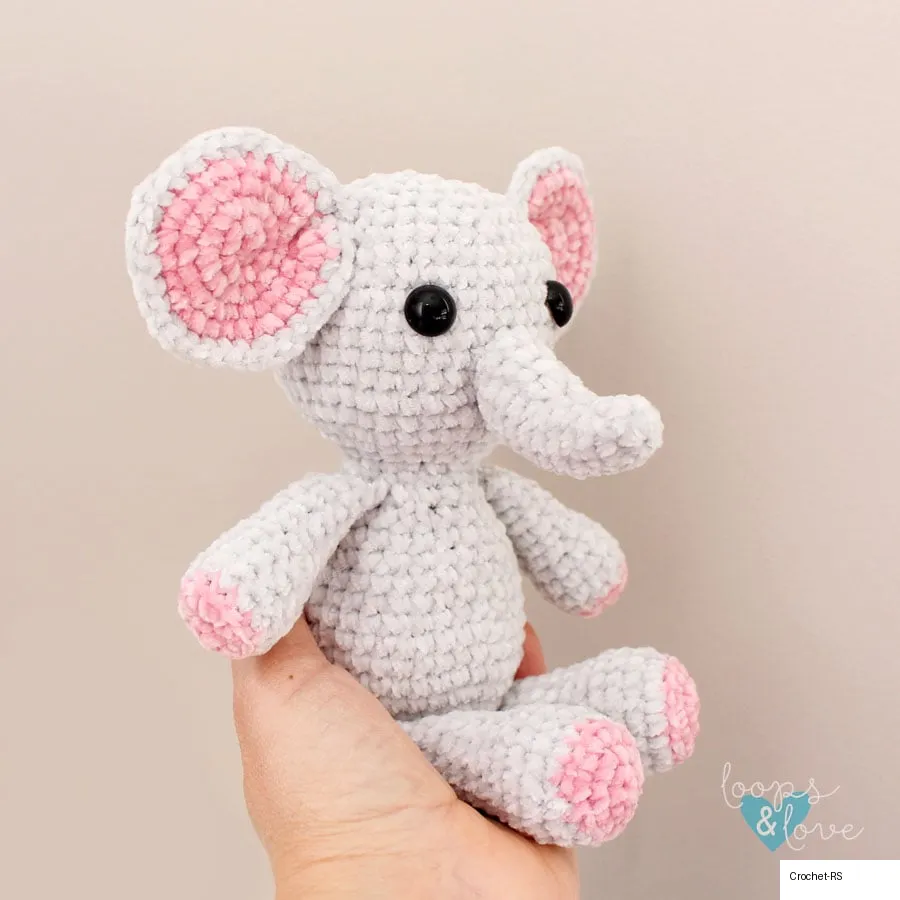
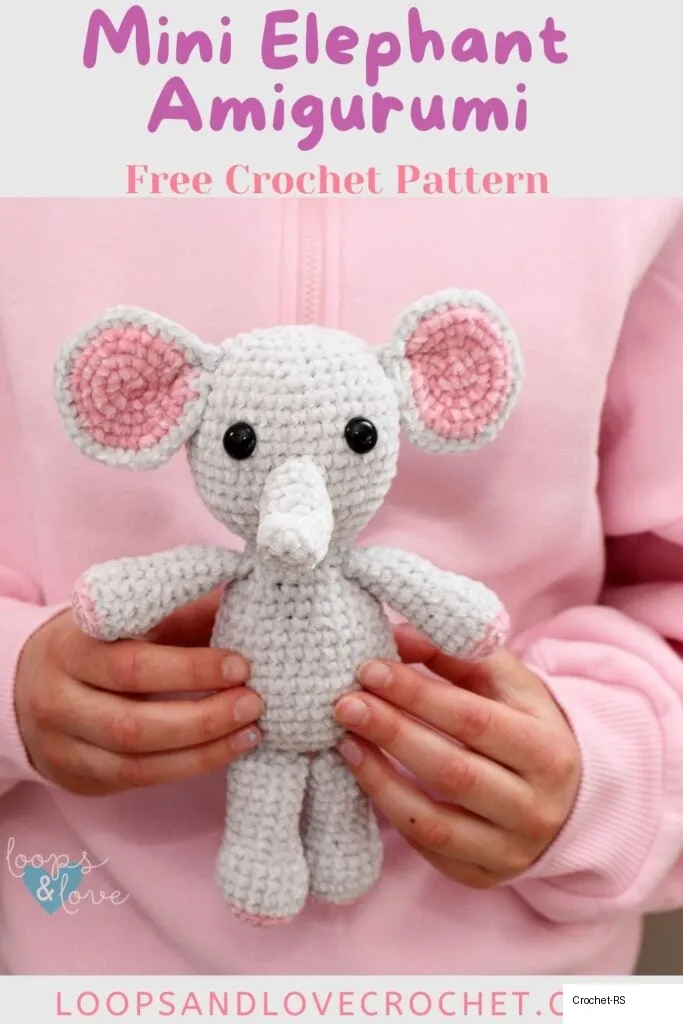
If you love quick, cute crochet projects, this Mini Elephant Amigurumi is the perfect little make! With its tiny trunk, sweet floppy ears, and squishy body, this elephant works up quickly and makes an adorable handmade gift, desk buddy, or nursery decoration.
I have been loving small amigurumi projects lately because they’re quick to make and are perfect for using up those leftover bits of yarn. Since they’re so fast, it’s also easy to make multiples of small amigurumi projects, like this mini elephant amigurumi! Whether you’re making a whole herd in different colors, or just one tiny elephant to brighten someone’s day, this little elephant is sure to bring a smile.
Materials Needed
- Worsted weight (#4) yarn – Any worsted-weight yarn for this project (cotton, acrylic, chenille, etc). Approximately 140 yds total (120 yds main color, 20 yds accent color). Lion Brand’s “A Star is Born: Naptime” yarn was used for the pictured elephant.
- 3.5mm crochet hook – or your preferred hook size.
- Safety eyes – 12mm size (or eyes can be embroidered on).
- Stuffing – any fiber-based stuffing (PolyFil or Fiberfill).
- Yarn needle – for sewing pieces together and weaving in ends.
- Scissors – for cutting yarn.
Pattern Details & Notes
Stitches Used
- Ch – chain
- Sl St – slip stitch
- SC – single crochet
- INV DEC – invisible single crochet decrease
Size & Gauge
- Size: When finished, this elephant measures approximately 7.5” tall from head to feet with the legs hanging straight.
Pattern Notes
- Magic Circle: The pattern starts with a magic circle.
- Continuous Rounds: Worked up in continuous rounds. Do not join at the end of rounds, just keep working in a spiral. Use a stitch marker.
- Color Changes: Work the last stitch of the round as normal right up to the last yarn over. Yarn over in the new color and complete the stitch.
Step-by-Step Instructions
Main color = grey, Accent color = pink.
1. Trunk
- Round 1: In main color, magic circle, ch 1, make 6 SC into ring (6)
- Round 2: *2 SC in first st, SC in next 2 sts, repeat from * around (8)
- Rounds 3-4: SC in each st around (8)
- Round 5: *2 SC in first st, SC in next 3 sts, repeat from * around (10)
- Round 6: SC in each st around (10)
- Round 7: *2 SC in first st, SC in next 4 sts, repeat from * around (12)
- Round 8: SC in each st around (12)
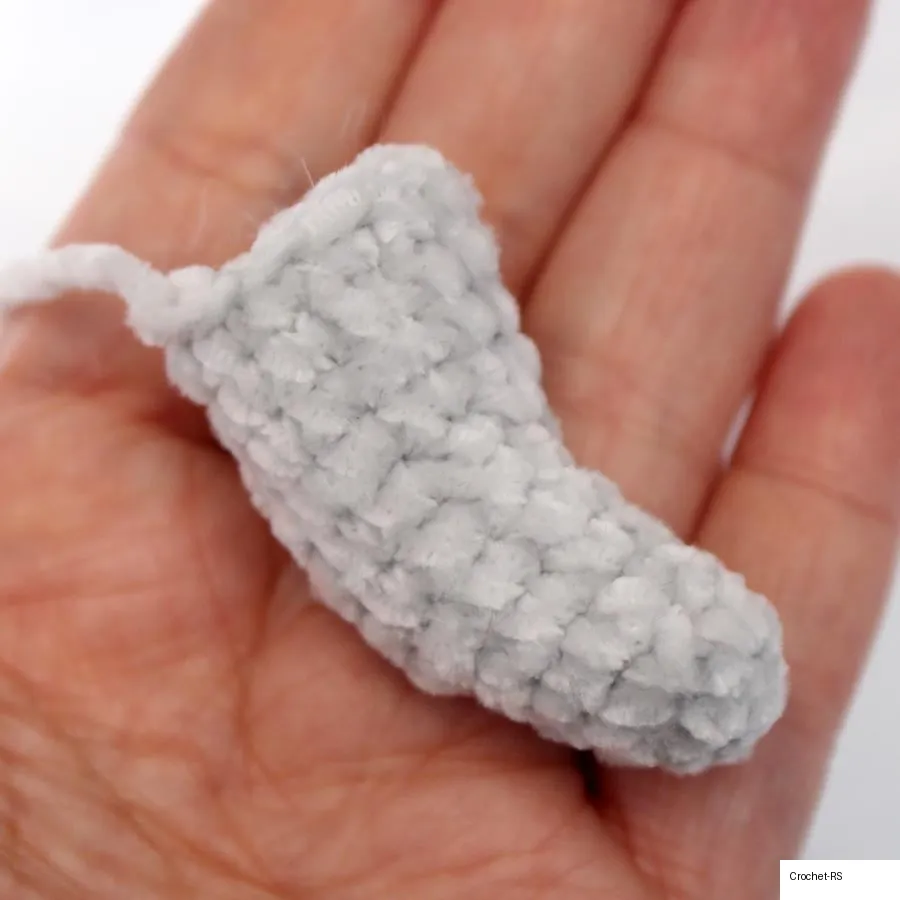
The next 2 rounds will help give the trunk a curve.
- Rounds 9-10: INV DEC, SC in next 4 sts, 2 SC in next st, SC in next 5 sts (12)
- Round 11: SC in each st around (12)
Fasten off, weave in ends. Stuff trunk and set aside for attaching to the head later. If you’d like the trunk to be more curved, you can use your yarn needle and a piece of yarn to sew through a few stitches inside the curve and pull it tighter.
2. Body and Head
Stuff the body as you go. Make sure that enough stuffing is added before the opening at the top is too small.
- Round 1: In main color, magic circle, ch 1, make 6 SC into ring (6)
- Round 2: 2 SC in each st around (12)
- Round 3: *2 SC in first st, SC in next st, repeat from * around (18)
- Round 4: *2 SC in first st, SC in next 2 sts, repeat from * around (24)
- Round 5: *2 SC in first st, SC in next 3 sts, repeat from * around (30)
- Round 6: *2 SC in first st, SC in next 4 sts, repeat from * around (36)
- Rounds 7-10: SC in each st around (36)
- Round 11: *INV DEC, SC in next 4 sts, repeat from* around (30)
- Rounds 12-13: SC in each stitch around (30)
- Round 14: *INV DEC, SC in next 3 sts, repeat from * around (24)
- Rounds 15-16: SC in each st around (24)
Add stuffing to lower portion of the body. Keep stuffing 1-2 rounds below the round you’re working.
- Round 17: *INV DEC, SC in next 2 sts, repeat from * around (18)
- Round 18: *INV DEC, SC in next st, repeat from * around (12)
This ends the body portion. Do not fasten off. Next, we’ll start increasing again to form the head.
- Round 19: *2 SC in first st, SC in next st, repeat from * around (18)
- Round 20: *2 SC in first st, SC in next 2 sts, repeat from * around (24)
- Round 21: *2 SC in first st, SC in next 3 sts, repeat from * around (30)
- Round 22: *2 SC in first st, SC in next 4 sts, repeat from * around (36)
- Round 23: *2 SC in first st, SC in next 5 sts, repeat from * around (42)
- Rounds 24-31: SC in each st around (42)
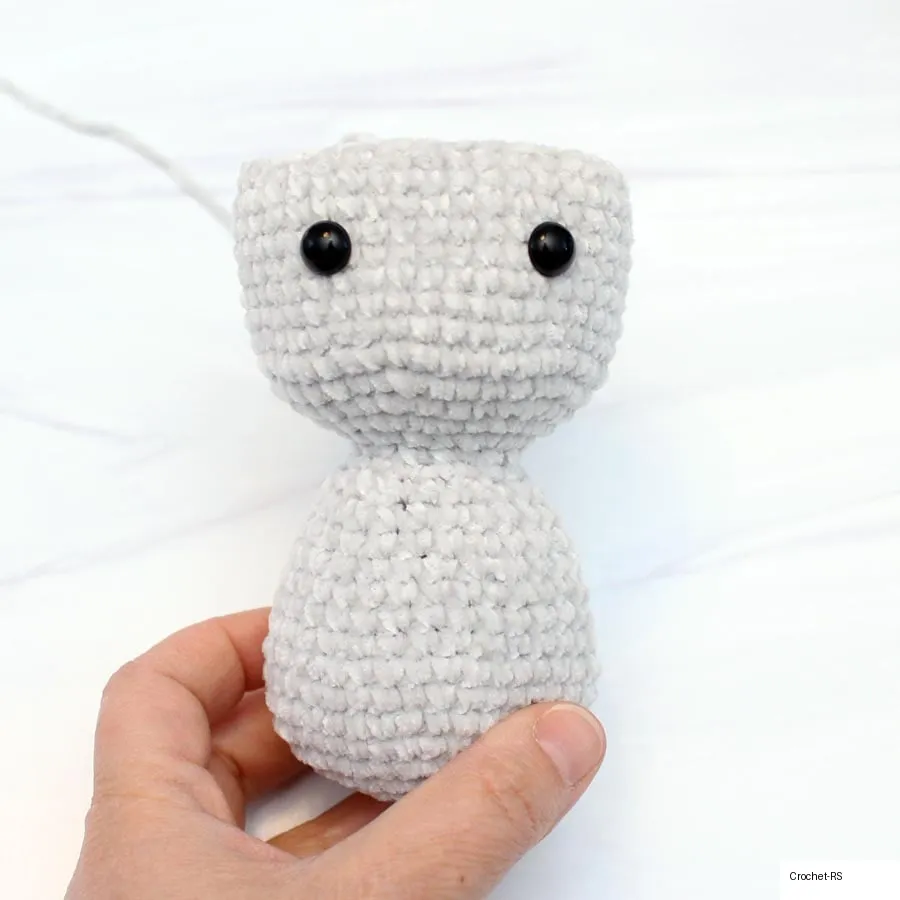
Insert safety eyes between rounds 28 and 29, about 7 stitches apart in the center of the face. Sew on the trunk onto the center of the face. The top of the trunk lines up with the bottom of the eyes.
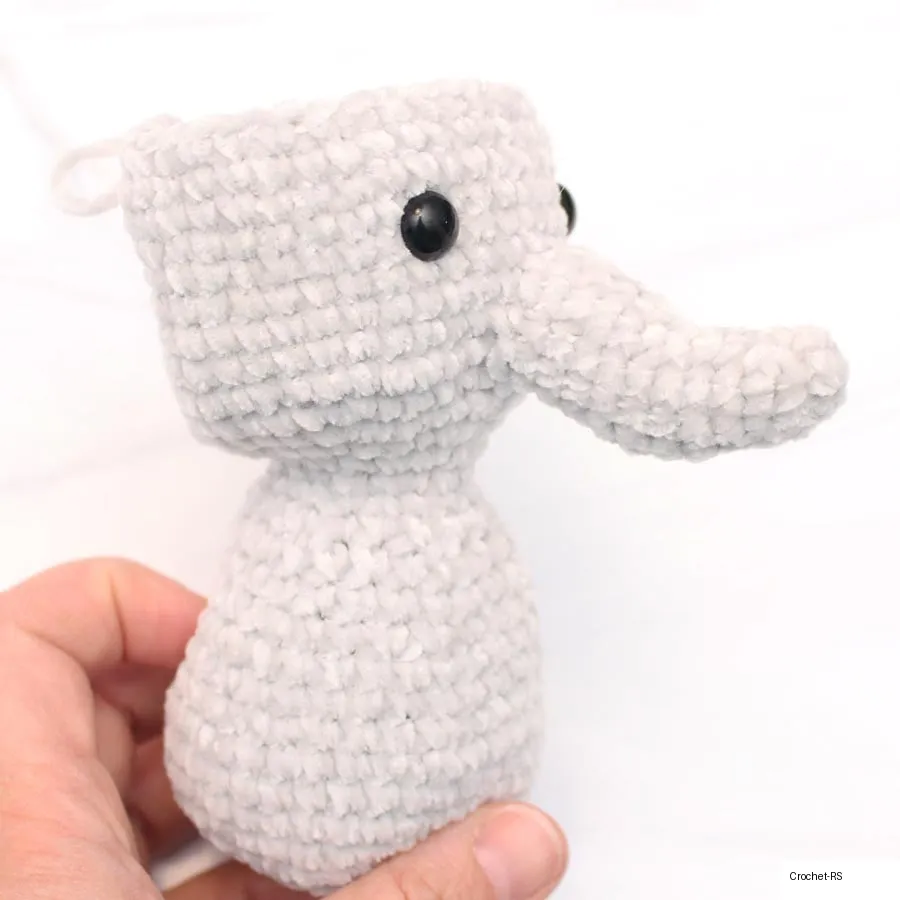
Stuff the top of body, neck area, and head as you go. Make sure you stuff the neck area enough to help prevent the head from wobbling.
- Round 32: *INV DEC, SC in next 5 sts, repeat from * around (36)
- Round 33: *INV DEC, SC in next 4 sts, repeat from * around (30)
- Round 34: *INV DEC, SC in next 3 sts, repeat from * around (24)
- Round 35: *INV DEC, SC in next 2 sts, repeat from * around (18)
*Make sure the head is well-stuffed before the opening gets too small.
- Round 36: *INV DEC, SC in next stitch, repeat from * around (12)
- Round 37: INV DEC around (6)
Fasten off and cut yarn. Sew top closed.
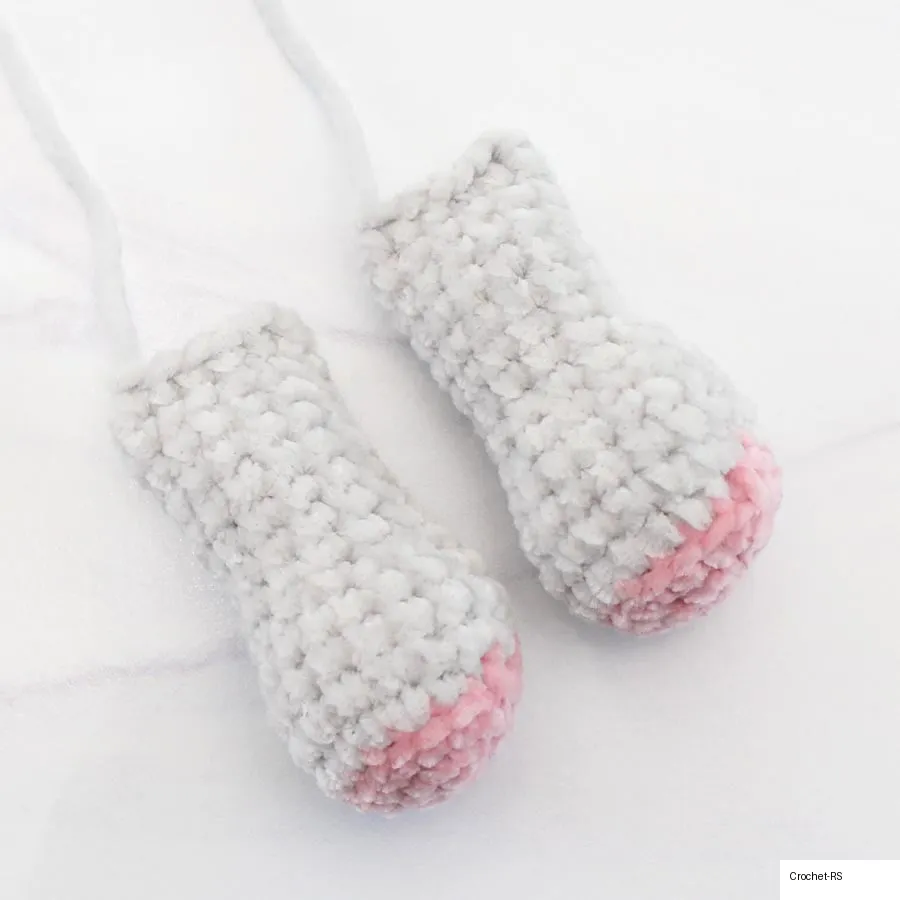
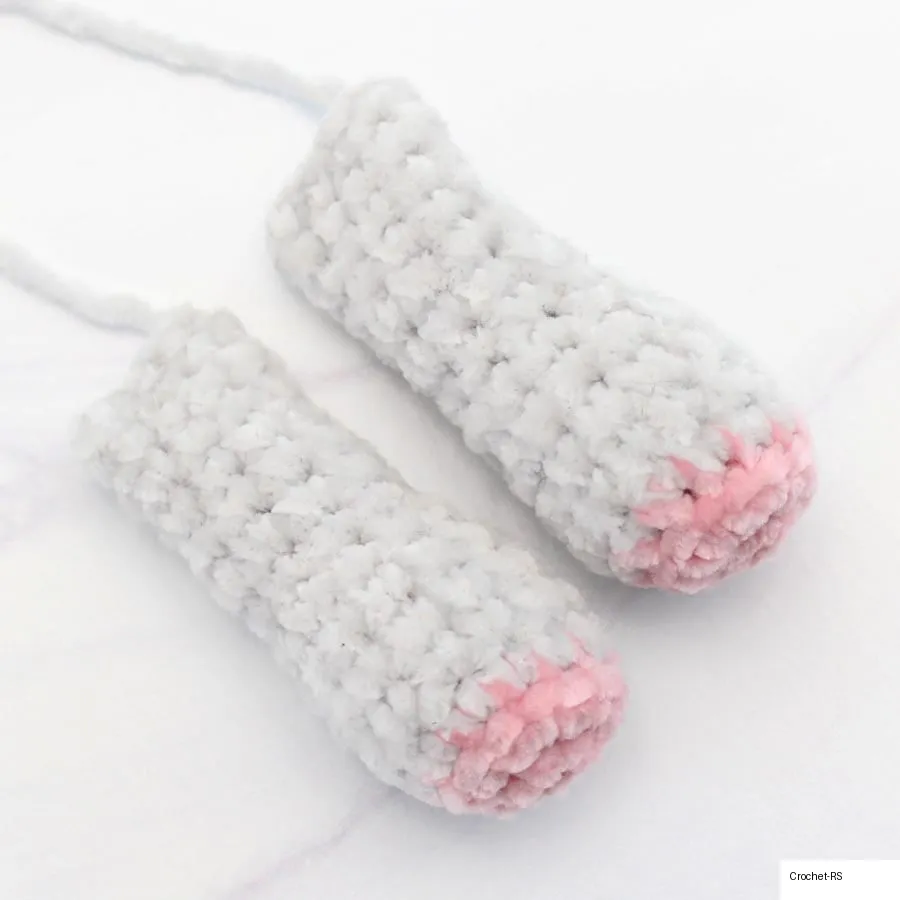
3. Legs (Make 2)
Stuff the legs as you go. Firmly stuff the foot and lower leg, gently stuff the rest of the way up.
- Round 1: In accent color, magic circle, ch 1, make 6 SC into ring (6)
- Round 2: 2 SC in each st around (12)
- Round 3: *2 SC in first st, SC in next st, repeat from * around. (18)
- Change to main color
- Round 4: BLO SC in each st around (18)
- Rounds 5-7: SC in each st around (18)
- Round 8: *INV DEC, SC next st, repeat from * around (12)
- Rounds 9-15: SC in each st around (12)
Pinch leg flat and SC across the top (through both layers) to close. Fasten off, leaving a long tail.
4. Arms (Make 2)
Stuff the arms as you go. Firmly stuff the bottom of the arms, but gently stuff the rest of the way up.
- Round 1: In accent color, magic circle, ch 1, make 6 SC into ring (6)
- Round 2: 2 SC in each st around (12)
- Change color to main color
- Round 3: BLO SC in each st around (12)
- Rounds 4-6: SC in each st around (12)
- Round 7: *INV DEC, SC next 2 sts, repeat from * around (9)
- Rounds 8-13: SC in each st around (9)
Pinch arm flat and SC across the top (through both layers) to close. Fasten off, leaving a long tail.
5. Ears (Make 2)
- Round 1: In accent color, magic circle, ch 1, make 6 SC into ring (6)
- Round 2: 2 SC in each st around (12)
- Round 3: *2 SC in first st, SC in next st, repeat from * around. (18)
- Round 4: *2 SC in first st, SC in next 2 sts, repeat from * around. (24)
- Round 5: *2 SC in first st, SC in next 3 sts, repeat from * around. (30)
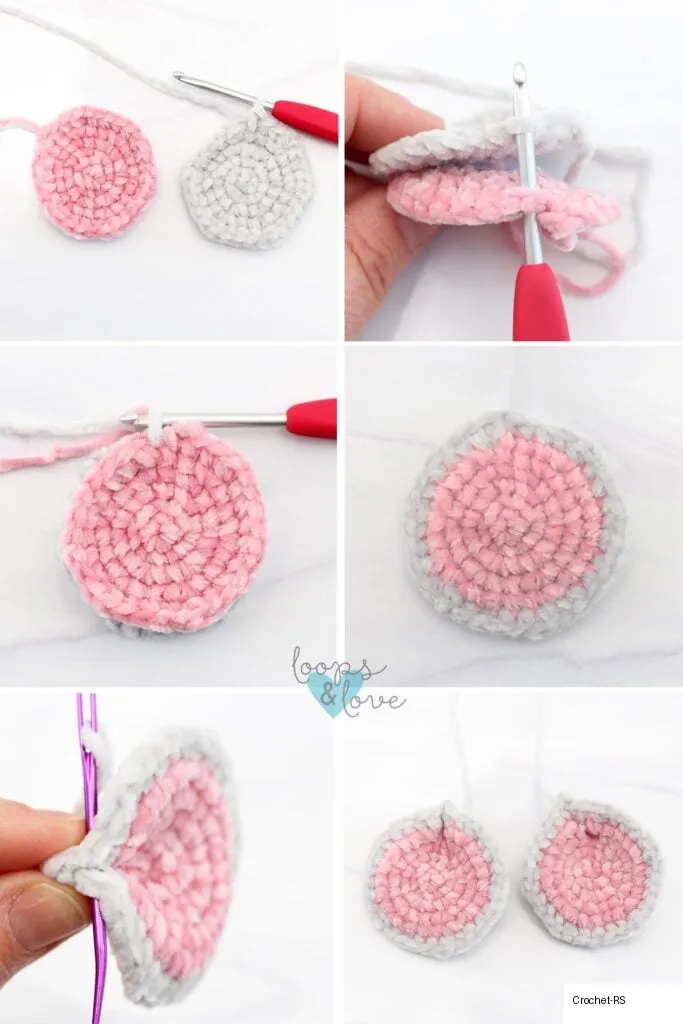
Fasten off. This circle will be the inner ear part. Next, using the main color, repeat rounds 1-5. Do not fasten off on the second circle.
Place the first circle (accent color) on top of the second circle (main color) and line up the stitches. Keep the “right sides” facing outwards. Insert hook through the next stitch on the top circle and grab the loop of yarn from the back circle, pulling it through to the front. Chain 1 and follow round 6 below, making sure to work through both layers.
- Round 6: *2 SC in first st, SC in next 4 sts, repeat from * around. Sl st join to first SC (36)
Fasten off. Leave a long tail to sew the ear onto the head. Repeat rounds 1-6 again for the second ear.
Next, add some shape to the ears by pinching a fold in the top of each ear and using your yarn needle and yarn tail to sew the fold together about a quarter to a third of the way into the ear.
6. Assembly
- Sew on the arms: Line up the arms on the body at around the second round below the head, leaving a small gap between the arms and head as a neck space. Sew in and out of each stitch at the top of each arm and passing through a stitch on the body.
- Sew on the legs: Line up where you want the legs to be on the body. For the elephant pictured, the legs are sewn more towards the front of the body (two rounds forwards from the center ring) so the elephant can sit a little flatter. Attach the legs by sewing through each stitch at the top of each leg and passing through a stitch on the body.
- Sew on the ears: Line up each ear on the elephant’s head. Start sewing the top of the ear in roughly the 5th round from the top of the head. To have the ears stand out and the inner ear part facing forward, first start by sewing in and out of the folded part at the back of the ear. Then add a few stitches down the front edge of the ear, attaching it to the face.
Great job! You are all done! I hope you loved making this cute and cuddly little elephant!