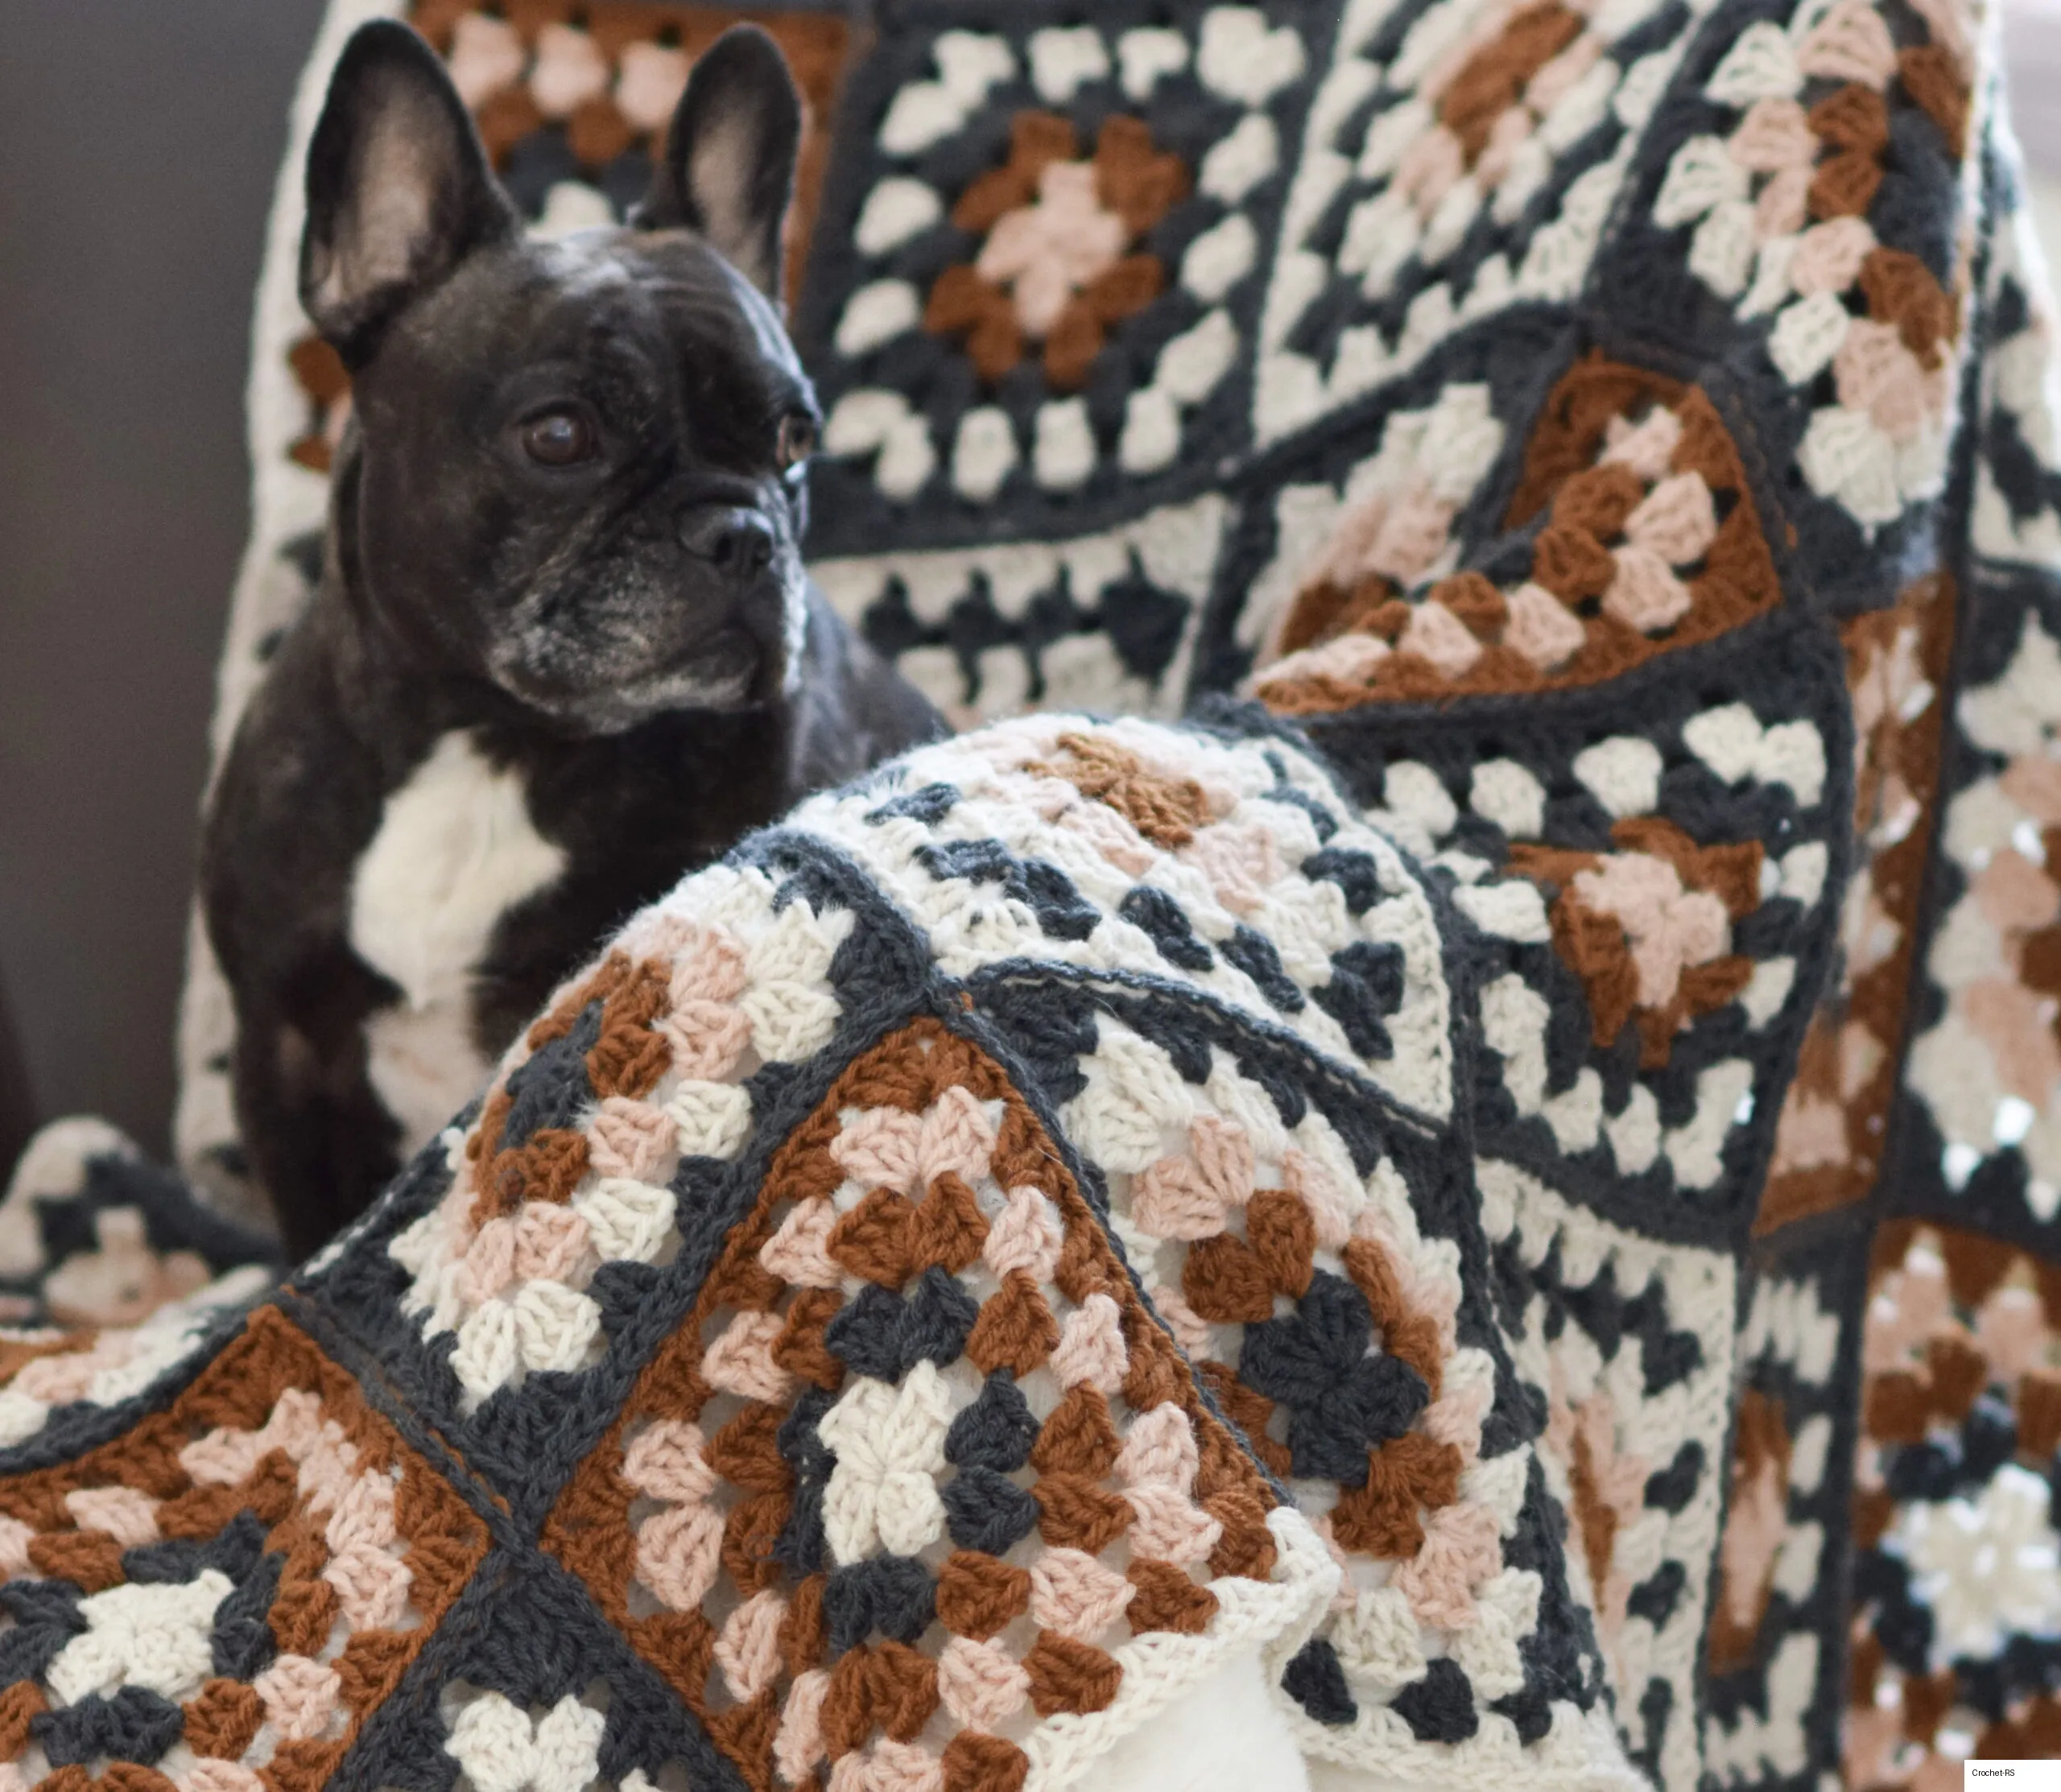
Nora Granny Square Throw Blanket Pattern
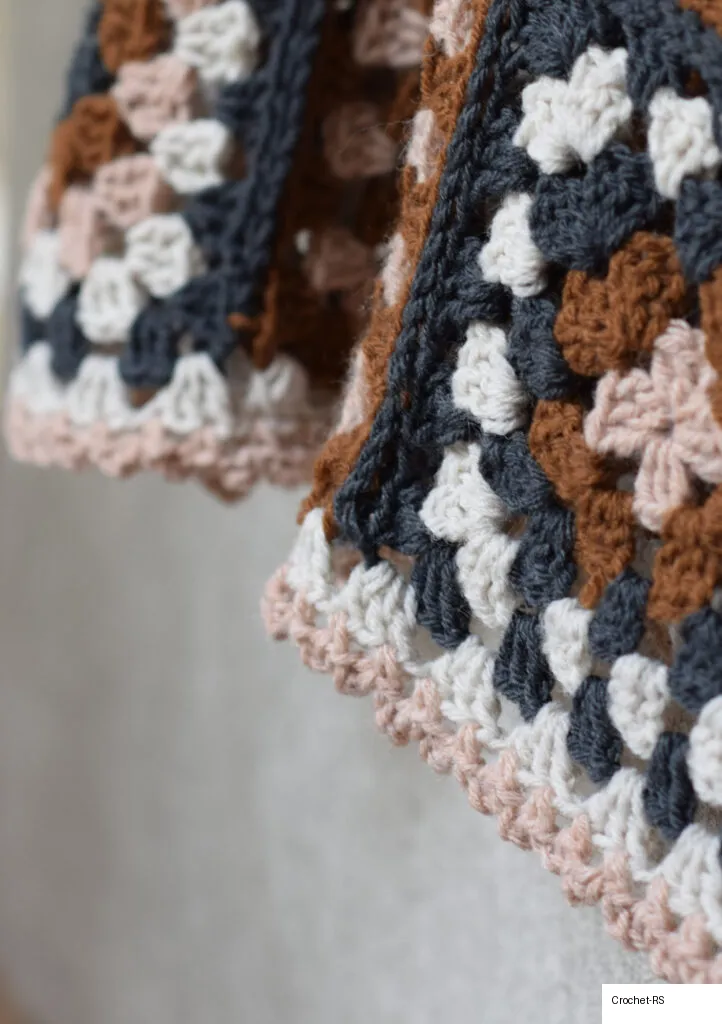
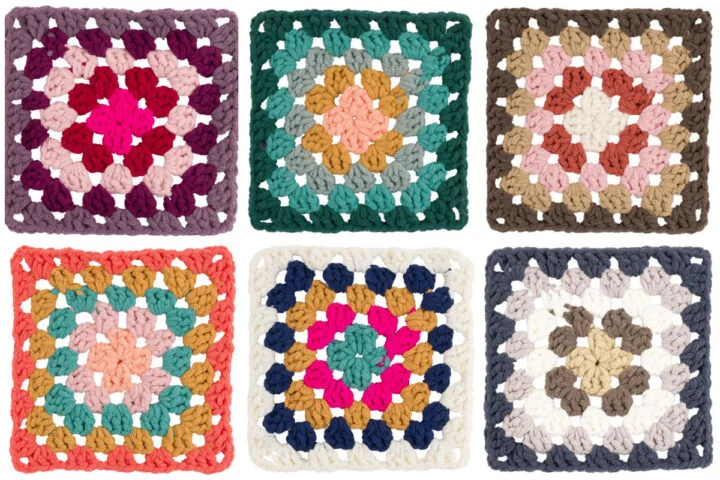
A modern take on the classic granny square blanket, this on-trend throw makes for a fun and beautiful project! Completely customizable, pick your favorite four colors, and crochet away. Each square is worked in a simple five round pattern, then seamed to finish.
Materials Needed
- 3 (4) Lion Brand Wool Ease in Flint (197 yds/85 grams per skein)
- 2 (3) Lion Brand Wool Ease in Umber
- 2 (3) Lion Brand Wool Ease in Canyon Sunset
- 3 (3) Lion Brand Wool Ease in Linen
- US size J 6.0 mm crochet hook
- Scissors
- Tapestry needle to weave in ends
(Note: Pattern uses approximately 620 g (830 g))
Pattern Details & Specifications
- Sizes:
- Lapghan/Small Throw: 43” x 43”
- Larger Throw: 43” x 57”
- Gauge: One 5-round square measures approximately 7” x 7”.
- Pattern Notes:
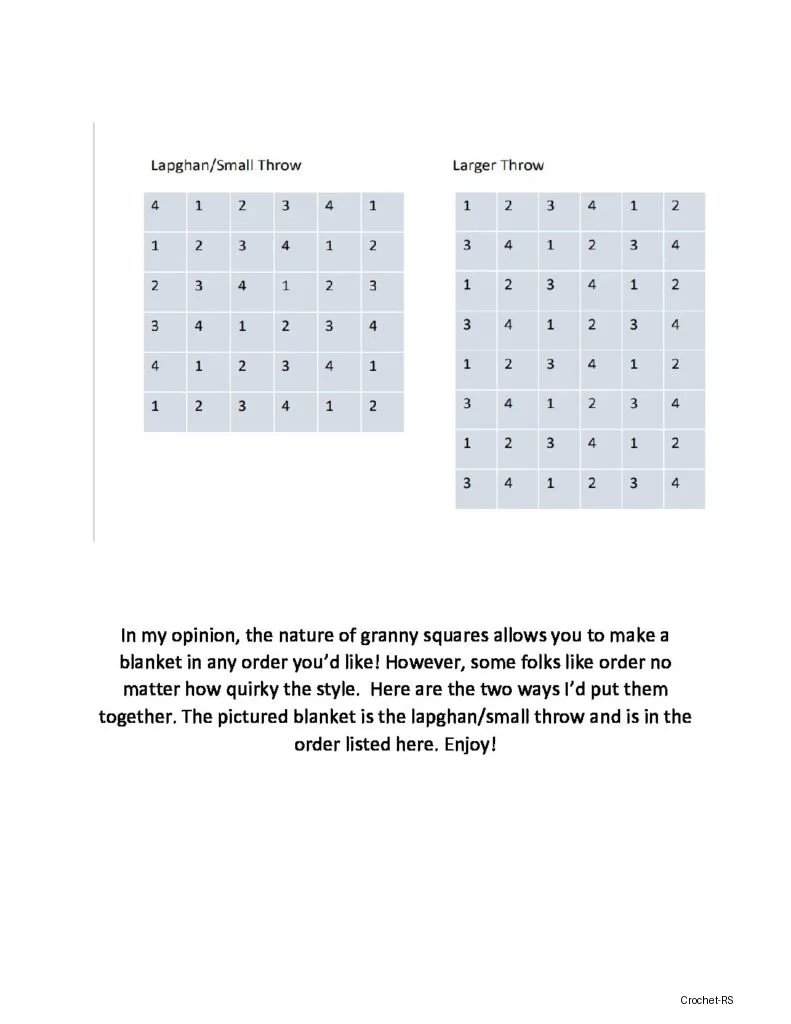
- You’ll crochet 36 (48) granny squares worked separately and seamed together.
- Squares are crocheted in joined rounds. Do not turn at the end of each round.
- To change colors, tie off, and join the new color in a corner.
- Abbreviations: ch (chain), ch sp (chain space), st (stitch), dc (double crochet), rep (repeat), rnd (round), sl st (slip stitch).
Square Quantities & Color Order
Total Squares Needed: 36 (48)
- Square #1: Make 10 (12)
- Rnd 1: Linen
- Rnd 2: Flint
- Rnd 3: Umber
- Rnd 4: Canyon Sunset
- Rnd 5: Umber
- Square #2: Make 9 (12)
- Rnd 1: Flint
- Rnd 2: Umber
- Rnd 3: Canyon Sunset
- Rnd 4: Linen
- Rnd 5: Flint
- Square #3: Make 8 (12)
- Rnd 1: Umber
- Rnd 2: Canyon Sunset
- Rnd 3: Linen
- Rnd 4: Flint
- Rnd 5: Linen
- Square #4: Make 9 (12)
- Rnd 1: Canyon Sunset
- Rnd 2: Umber
- Rnd 3: Flint
- Rnd 4: Linen
- Rnd 5: Flint
Step-by-Step Instructions
Step 1: Crochet the Granny Squares
Follow the pattern below to make the required 36 (48) five-round granny squares:
- Foundation: Ch 3, join with sl st to form a ring.
- Round 1: Ch 3 (counts as dc), 2 dc in ring, *ch 2, 3 dc in ring; repeat from * 3 times, ch 2; join with sl st in top of beg ch-3. (12 dc and 4 ch-2 sps in this rnd). Tie off.
- Round 2: Join next color in any ch-2 sp of Rnd 1, ch 3 (counts as dc), (2 dc, ch 2, 3 dc) in same ch-2 sp (first corner made), * ch 1, (3 dc, ch 2, 3 dc) in next ch-2 sp (corner made); rep from * 2 more times, ch 1; join with sl st in top of beg ch-3. Tie off.
- Round 3: Join next color in any corner ch-2 sp of Rnd 2, ch 3, (2 dc, ch 2, 3 dc) in same ch-2 sp, ch 1, 3 dc in next ch-1 sp, * ch 1, (3 dc, ch 2, 3 dc) in next corner ch-2 sp, ch 1, 3 dc in next ch-1 sp; rep from * 2 more times, ch 1, join with sl st in top of beg ch-3. Tie off.
- Round 4: Join next color in any corner ch-2 sp of Rnd 3, ch 3, (2 dc, ch 2, 3 dc) in same ch-2 sp, [ch 1, 3 dc in next ch-1 sp] twice, * ch 1, (3 dc, ch 2, 3 dc) in next corner ch-2 sp, [ch 1, 3 dc in next ch-1 sp] twice; rep from * 2 more times, ch 1; join with sl st in top of beg ch-3. Tie off.
- Round 5: Join next color in any corner ch-2 sp of Rnd 4, ch 3, (2 dc, ch 2, 3 dc) in same ch-2 sp, [ch 1, 3 dc in next ch-1 sp] three times, * ch 1, (3 dc, ch 2, 3 dc) in next corner ch-2 sp, [ch 1, 3 dc in next ch-1 sp] three times; rep from * 2 more times, ch 1; join with a sl st in top of beg ch-3. Tie off.
- Finishing Squares: Weave in all loose ends.
Step 2: Assembly & Seaming
Seam squares together in the layout order using a flat slip stitch seam (or preferred seaming method). Lay out all squares in the grid before seaming to verify placement.
Step 3: Main Border (Optional)
Finish with an optional border around the entire blanket using your preferred yarn color:
- Work
(3 dc, ch 2, 3 dc)in each corner space of the blanket. - Work
*ch 1, 3 dcin each space around the perimeter.
Step 4: Picot Edging (Optional)
Work picot edging along the top and bottom edges of the blanket:
- Pick up preferred yarn color in corner of blanket with right side facing up.
*Ch 3, single crochet into 3rd chain from hook, skip a stitch, single crochet into next stitch.- Repeat from
*across the edge. If you end up with an extra stitch at the end, make a single crochet into that stitch. Tie off and weave in ends.