Free Panda Crochet Pattern | Ying the Panda
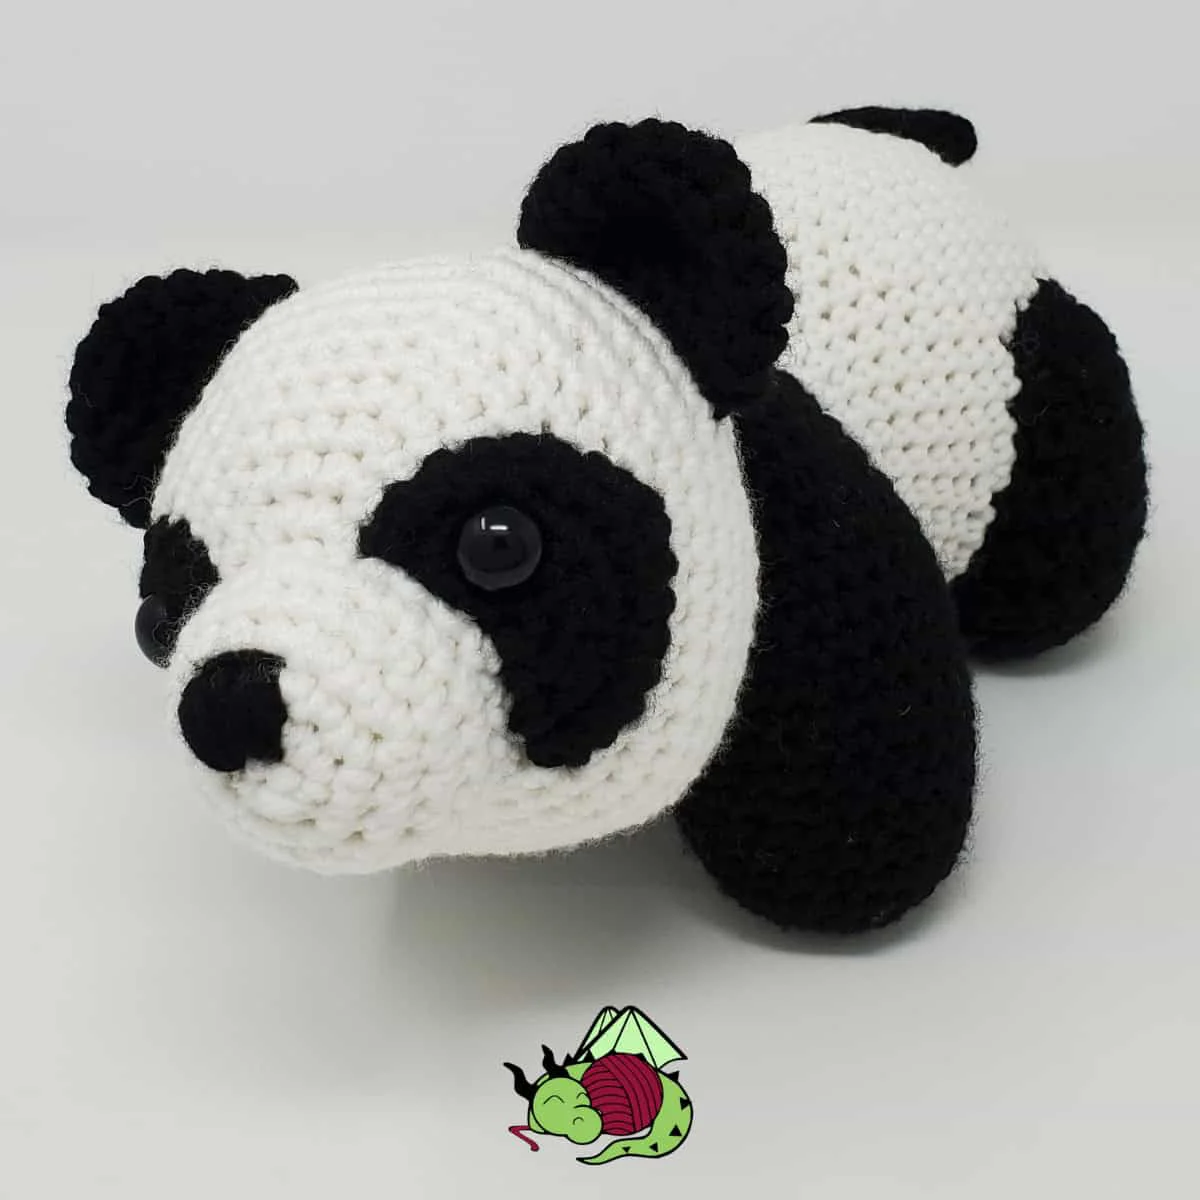
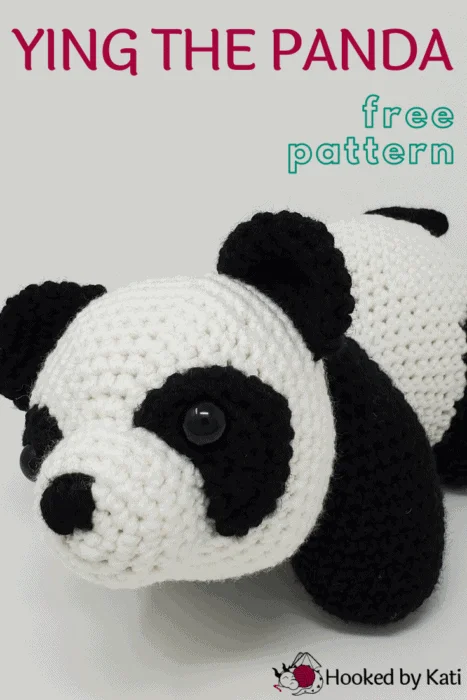
Welcome back to another delightful crochet project! Today, we have an absolutely adorable, wonderfully sweet, and perfectly charming amigurumi pattern for you to try: the cutest little Panda friend! If you love crafting beautiful handmade toys that perfectly capture classic kawaii plush charm while offering a beautifully detailed, lovable design to keep you engaged, this gorgeous little bamboo-munching buddy is going to be your next favorite make.
This fantastic amigurumi pattern is wonderfully adaptable and perfect for unforgettable handmade gifts, allowing you to whip up beautiful, lovable companions in no time that will be cherished as family keepsakes for years! While the instructions highlight a classic black-and-white look, you can easily adjust the color variations depending on the worsted weight yarn used—swap out classic panda colors for magical brights, soft neutrals, or vibrant bold hues to create a whimsical, personalized plush! Grab your hooks, settle into your favorite crafting spot, and let’s dive into making this wonderfully cuddly, completely adorable crochet Panda!


Supplies
- Red Heart With Love yarn, 100% acrylic, worsted weight, 370 yds/7 oz/198 g, Black (BLK), 1 ball; White (WHT), 1 ball.
- Furls G (4.00 mm) hook
- Two 15 mm solid black safety eyes
- Polyfil stuffing
- Tapestry needle
- Straight pins
Measurements
11.5 inches long x 7 inches tall
Gauge
8 sts x 8 rows in sc = 2” x 2”
Pattern Notes
- Rows labeled “WS” or “wrong side” are worked with the stitches facing the inside of the piece; rows labeled “RS” or “right side” are worked with the stitches facing the outside of the piece as normal. This is to help you keep track of your rows while working short rows.
- Rounds labeled “Short rnd” are worked back and forth and will end before the round is complete, leaving stitches deliberately unworked to be worked in later rounds as instructed.
Instructions
Thank you for reading the pattern here on my site! Your visits help support my work so I can keep creating more amigurumi designs, tutorials, and free resources for you. If you would like to save this for later, click the heart/star on your mobile browser or press CTRL + D on your keyboard to bookmark the page.
Front Legs
(One piece, worked from feet up)
Foot One
With BLK, ch 2.
Rnd 1: 6 sc in second ch from hook. (6)
Rnd 2: Inc in each st around. (12)
Rnd 3: [Sc, inc] 6 times. (18)
Rnd 4: [2 sc, inc] 6 times. (24)
Rnds 5-7: Sc evenly around.
Bind off and set aside.
Foot Two
With BLK, ch 2.
Rnd 1: 6 sc in second ch from hook. (6)
Rnd 2: Inc in each st around. (12)
Rnd 3: [Sc, inc] 6 times. (18)
Rnd 4: [2 sc, inc] 6 times. (24)
Rnds 5-7: Sc evenly around.
Rnd 8: Do not break yarn, ch 3, 24 sc on Foot One, 3 sc on ch between feet, 24 sc around Foot Two, 3 sc on underside of ch. (54)
Rnds 9-16: Sc evenly around.
Stuff feet.
Rnd 17: [7 sc, dec] 6 times. (48)
Rnd 18: [6 sc, dec] 6 times. (42)
Rnd 19: [5 sc, dec] 6 times. (36)
Rnd 20: [4 sc, dec] 6 times. (30)
Rnd 21: [3 sc, dec] 6 times. (24)
Rnd 22: [2 sc, dec] 6 times. (18)
Finish stuffing.
Rnd 23: [Sc, dec] 6 times. (12)
Rnd 24: Dec 6 times. (6)
Cut yarn. Thread needle through front loops of remaining 6 stitches. Pull tight to close. Weave in ends.
Body
With WHT, ch 2.
Rnd 1: 6 sc in second ch from hook. (6)
Rnd 2: Inc in each st around. (12)
Rnd 3: [Sc, inc] 6 times. (18)
Rnd 4: [2 sc, inc] 6 times. (24)
Rnd 5: [3 sc, inc] 6 times. (30)
Rnd 6: [4 sc, inc] 6 times. (36)
Rnd 7: [5 sc, inc] 6 times. (42)
Rnd 8: [6 sc, inc] 6 times. (48)
Rnds 9-16: Sc evenly around.
Rnd 17: [6 sc, dec] 6 times. (42)
Rnds 18-22: Sc evenly around.
Bind off leaving long tail for sewing.
Stuff.
Mark a hexagon (6 sides) with pins on one side of the front legs. Each “side” will be 7 stitches or rows long.
Using pinned hexagon as a guide, sew open end of body to front legs. Add extra stuffing to body before completing attachment.
Hind Legs
(Make 2)
With BLK, ch 2.
Rnd 1: 6 sc in second ch from hook. (6)
Rnd 2: Inc in each st around. (12)
Rnd 3: [Sc, inc] 6 times. (18)
Rnd 4: [2 sc, inc] 6 times. (24)
Rnd 5: Sc evenly around.
Rnd 6: Sc evenly around, turn.
Rnd 7: (WS) (Short Rnd) 12 sc, leave remaining 12 sc unworked, turn. (12)
Rnd 8: (RS) (Short Rnd) 11 sc, leave remaining st unworked, turn. (11)
Rnd 9: (WS) (Short Rnd) 10 sc, leave remaining st unworked, turn. (10)
Rnd 10: (RS) (Short Rnd) 9 sc, leave remaining st unworked, turn. (9)
Rnd 11: (WS) (Short Rnd) 8 sc, leave remaining st unworked, turn. (8)
Rnd 12: (RS) (Short Rnd) 7 sc, leave remaining st unworked, turn. (7)
Rnd 13: (WS) (Short Rnd) 6 sc, leave remaining st unworked, turn. (6)
Rnd 14: (RS) (Short Rnd) 5 sc, leave remaining st unworked, turn. (5)
Rnd 15: (WS) (Short Rnd) 4 sc, leave remaining st unworked, turn. (4)
Rnd 16: (RS) Short Rnd) 4 sc.
Rnd 17: (RS) Working on unworked sts from previous rnds, 4 inc, 12 sc, 5 inc, 3 sc. (33)
Bind off leaving long tail for sewing.
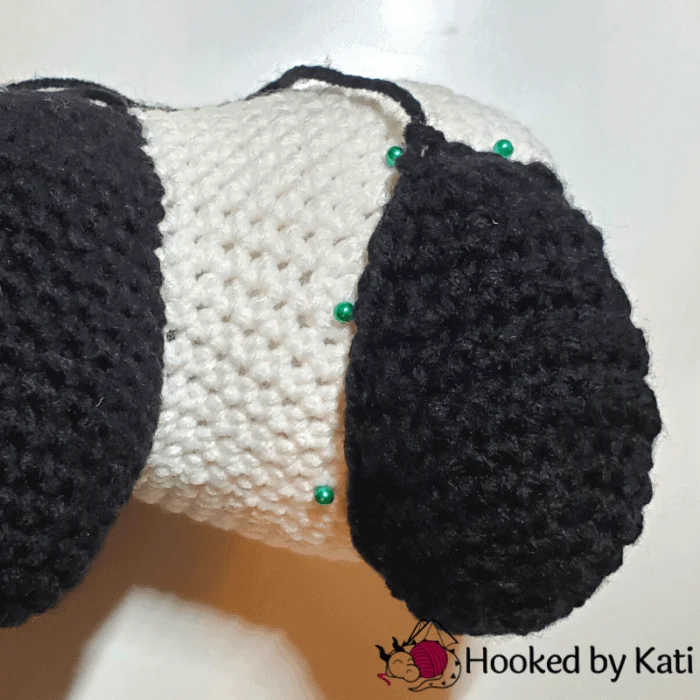
Pin on body at Rnd 10 in line with the inside edges of the front legs. Using this pin as a guide, align hind leg to body so the front and hind legs are in line with each other and the long edge of the hind leg is flush with the body. Pin where the leg touches the body.
Using the pins as a guide, sew hind legs to body. Stuff hind legs before completing attachment.
Head
With WHT, ch 2.
Rnd 1: 6 sc in second ch from hook. (6)
Rnd 2: Inc in each st around. (12)
Rnd 3: [Sc, inc] 6 times. (18)
Rnd 4: [2 sc, inc] 6 times. (24)
Rnd 5: [3 sc, inc] 6 times. (30)
Rnd 6: [4 sc, inc] 6 times. (36)
Rnd 7: [5 sc, inc] 6 times. (42)
Rnd 8: [6 sc, inc] 6 times. (48)
Rnd 9: [7 sc, inc] 6 times. (54)
Rnds 10-14: Sc evenly around.
Rnd 15: [7 sc, dec] 6 times. (48)
Rnd 16: [6 sc, dec] 6 times. (42)
Rnd 17: [5 sc, dec] 6 times. (36)
Rnd 18: [4 sc, dec] 6 times. (30)
Rnd 19: [3 sc, dec] 6 times. (24)
Rnd 20: [2 sc, dec] 6 times. (18)
Stuff.

Rnd 21: [Sc, dec] 6 times. (12)
Rnd 22: Dec 6 times. (6)
Cut yarn. Thread needle through front loops of remaining 6 stitches. Pull tight to close. Leave long tail for sewing.
Thread long tail through body and out any st of Rnd 17 for future use.
Snout
With WHT, ch 2.
Rnd 1: 6 sc in second ch from hook. (6)
Rnd 2: Inc in each st around. (12)
Rnd 3: [Sc, inc] 6 times. (18)
Rnd 4: [2 sc, inc] 6 times. (24)
Rnds 5-6: Sc evenly around.
Bind of leaving long tail for sewing.
Using pins, mark a 6 x 6 square on the head with the top “side” of the square crossing the center point of the head. Use the pins as a guide to sew the snout to the head. Stuff snout before completing attachment.
Eye Patches
(Make 2)
With BLK, ch 2.
Row 1: 4 sc in second ch from hook, turn. (4)
Row 2: Ch 1, inc in each st across, turn. (8)
Row 3: Ch 1, [Sc, inc] 4 times, turn. (12)
Row 4: Ch 1, [2 sc, inc] 4 times. (16)
Bind off leaving long tail for sewing.
Lay eye patches on a flat surface, curved edges on the outside, mirroring one another. Insert safety eyes in top half of each eye patch, near the shirt edge. Secure washers.
Nose
With a long strand of BLK, use a needle to sew a nose on the top side of the snout, evenly spaced between the eyes. Sew in vertical lines, two rows tall, from two sts on Rnd 2 to three sts on Rnd 4. Repeat stitches until nose is as thick as desired.
Ears
(Make 2)
With BLK, ch 2.
Rnd 1: 6 sc in second ch from hook. (6)
Rnd 2: Inc in each st around. (12)
Rnd 3: [Sc, inc] 6 times. (18)
Rnds 4-6: Sc evenly around.
Bind off leaving long tail for sewing.
Press flat. Ears will curve inward slightly.
Mark straight line for ear attachment 9 sts long, along Rnd 13. Inside edge of ears should be even with the inside edge of the eye patches, 8 sts apart. Sewing through both layers of the last rnd of the ears, attach ears. Bend so curves are facing forward.
Head Attachment
On front legs, use pins to mark a hexagon directly opposite body attachment. Each “side” will be 6 sts long. Mark a hexagon on the head around Rnd 17, also 6 sts on each “side.” Align head with desired tilt to front legs. Using long tail left on head and the pins as a guide, sew head to front legs.
Tail
With BLK, ch 2.
Rnd 1: 6 sc in second ch from hook. (6)
Rnd 2: Inc in each st around. (12)
Rnds 3-5: Sc evenly around.
Bind off leaving long tail for sewing.
Press flat. Sewing through both layers of last rnd, attach tail to Rnd 7 of body, evenly spaced between hind legs.