Best Easy Crochet Kitty Family Free Crochet Pattern
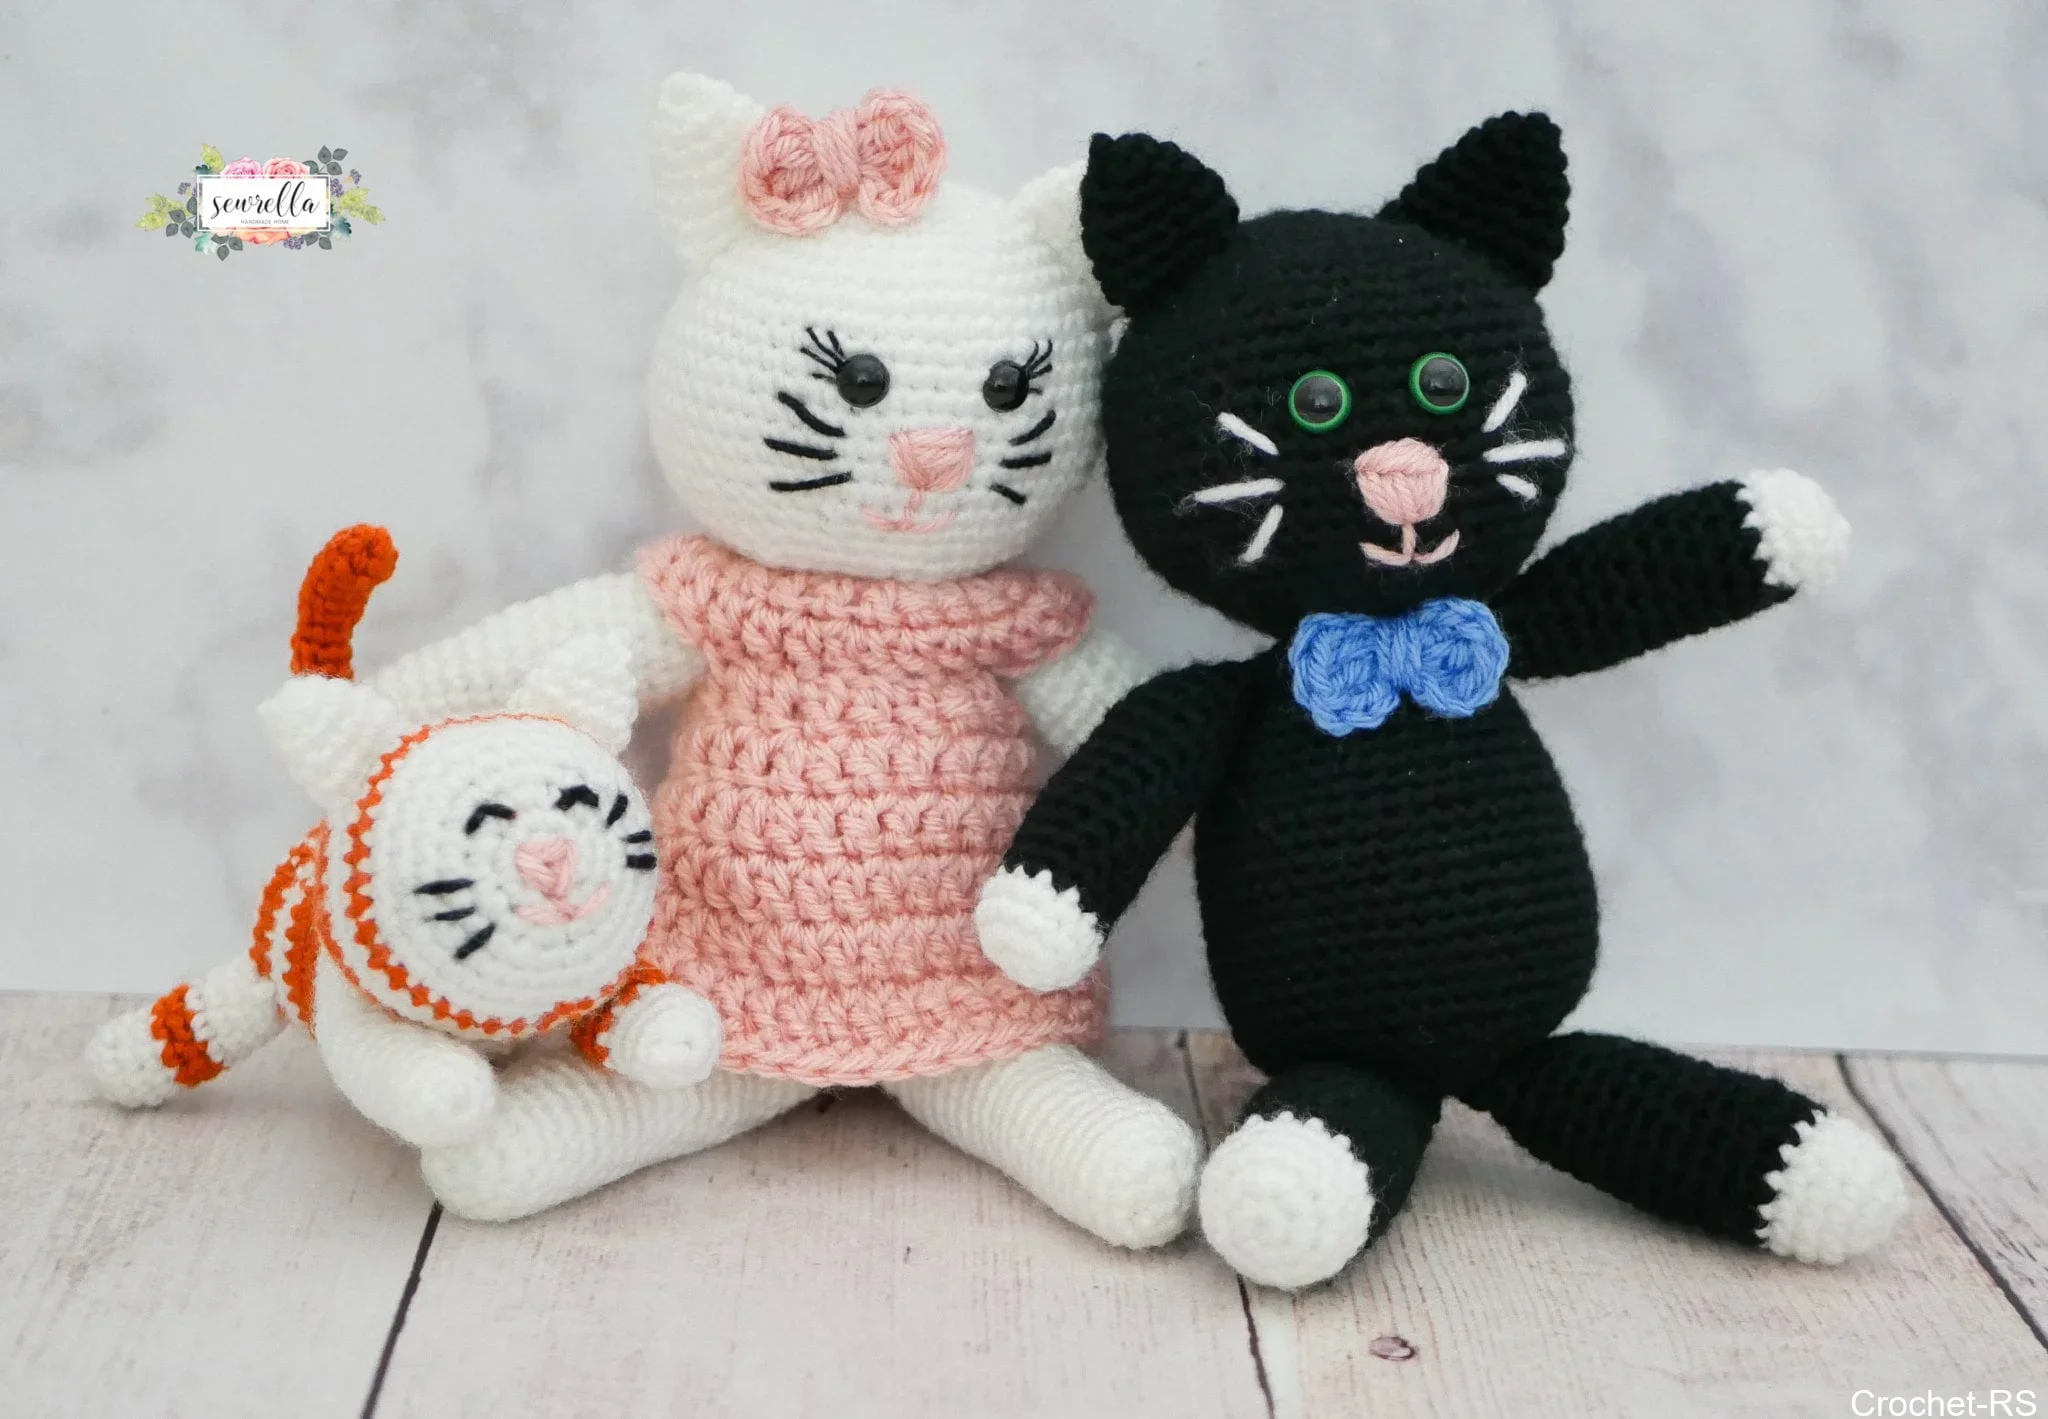
Are you looking for the absolute best free pattern for a crochet kitty family? You are in exactly the right place! We have discovered this top-rated, incredibly easy crochet design that is guaranteed to be a huge hit. Whether you want to make a quick handmade gift for a baby shower or create a beautiful keepsake, this project is fun, straightforward, and looks absolutely stunning when finished. Grab your softest yarn and let’s get started on your new favorite project!

- Get the ad-free, large print, printable PDF pattern from EtsyHERE.
- Grab the Ultimate Pattern Bundle that includes this pattern and 100+ others for under $30HERE.
- PIN this pattern to your Pinterest boards for laterHERE.
- Add this pattern to your Ravelry queueHERE.
Mama Kitty
Head
With B hook and white yarn, make a magic ring, Ch 1, 6 Sc in ring (6)
Round 2: 2 Sc in each around (12)
Round 3: 2 Sc, Sc in next, repeat around (18)
Round 4: 2 Sc, Sc in next 2, repeat around (24)
Round 5: 2 Sc, Sc in next 3, repeat around (30)
Round 6: 2 Sc, Sc in next 4, repeat around (36)
Round 7: 2 Sc, Sc in next 5, repeat around (42)
Round 8: 2 Sc, Sc in next 6, repeat around (48)
Round 9: 2 Sc, Sc in next 11, repeat around (52)
Round 10: 2 Sc, Sc in next 12, repeat around (57)
Rounds 11-18: Sc in each around (57)
Round 19: Sc decrease, Sc in next 12, repeat around (52)
Round 20: Sc decrease, Sc in next 11, repeat around (48)
-Begin stuffing with polyfil and stuff after each round until firm
Round 21: Sc decrease, Sc in next 6, repeat around (42)
Round 22: Sc decrease, Sc in next 5, repeat around (36)
Round 23: Sc decrease, Sc in next 4, repeat around (30)
Round 24: Sc decrease, Sc in next 3, repeat around (24)
Round 25: Sc decrease, Sc in next 2, repeat around (18)
Round 26: Sc decrease, Sc in next, repeat around (12)
Round 27: Sc decrease around (6) – do not break yarn
Body
Round 28: 2 Sc in each around (12)
Round 29: 2 Sc, Sc in next, repeat around (18)
Round 30: 2 Sc, Sc in next 2, repeat around (24)
Round 31: 2 Sc, Sc in next 3, repeat around (30)
Round 32: 2 Sc, Sc in next 4, repeat around (36)
Rounds 33-35: Sc in each around (36)
Round 36: 2 Sc, Sc in next 5, repeat around (42)
Rounds 37-46: Sc in each around (42)
Round 47: Sc decrease, Sc in next 5, repeat around (36)
-Begin stuffing with polyfil and stuff after each round until firm
Round 48: Sc decrease, Sc in next 4, repeat around (30)
Round 49: Sc decrease, Sc in next 3, repeat around (24)
Round 50: Sc decrease, Sc in next 2, repeat around (18)
Round 51: Sc decrease, Sc in next, repeat around (12)
Finish off and sew up the bottom of the kitty.
Ears
*Make 2
Make a magic ring, Ch 1, 4 Sc inside ring (4)
Round 2: 2 Sc, Sc in next, repeat around (6)
Round 3: 2 Sc, Sc in next 2, repeat around (8)
Round 4: 2 Sc, Sc in next 3, repeat around (10)
Round 5: 2 Sc, Sc in next 4, repeat around (12)
Round 6: 2 Sc, Sc in next 5, repeat around (14)
Round 7: Sc in each around (14)
Finish off and pinch to sew up. Sew onto the kitty’s head.
Dress
With an H hook and pink yarn, Ch 14, wrap the Ch around the neck (Round 27-28 of body) and sl st to the 1st Ch to form a ring, Ch 2, work 18 Dc into the ring (forming a neckline around the body), sl st to join to the 1st Dc of the Round, Ch 2 (18)
Round 2: 2 Dc, Dc in next 2, repeat around, sl st to join, Ch 2 (24)
Round 3: 2 Dc, Dc in next 3, repeat around, sl st to join, finish off leaving a long tail (about 18 inches)
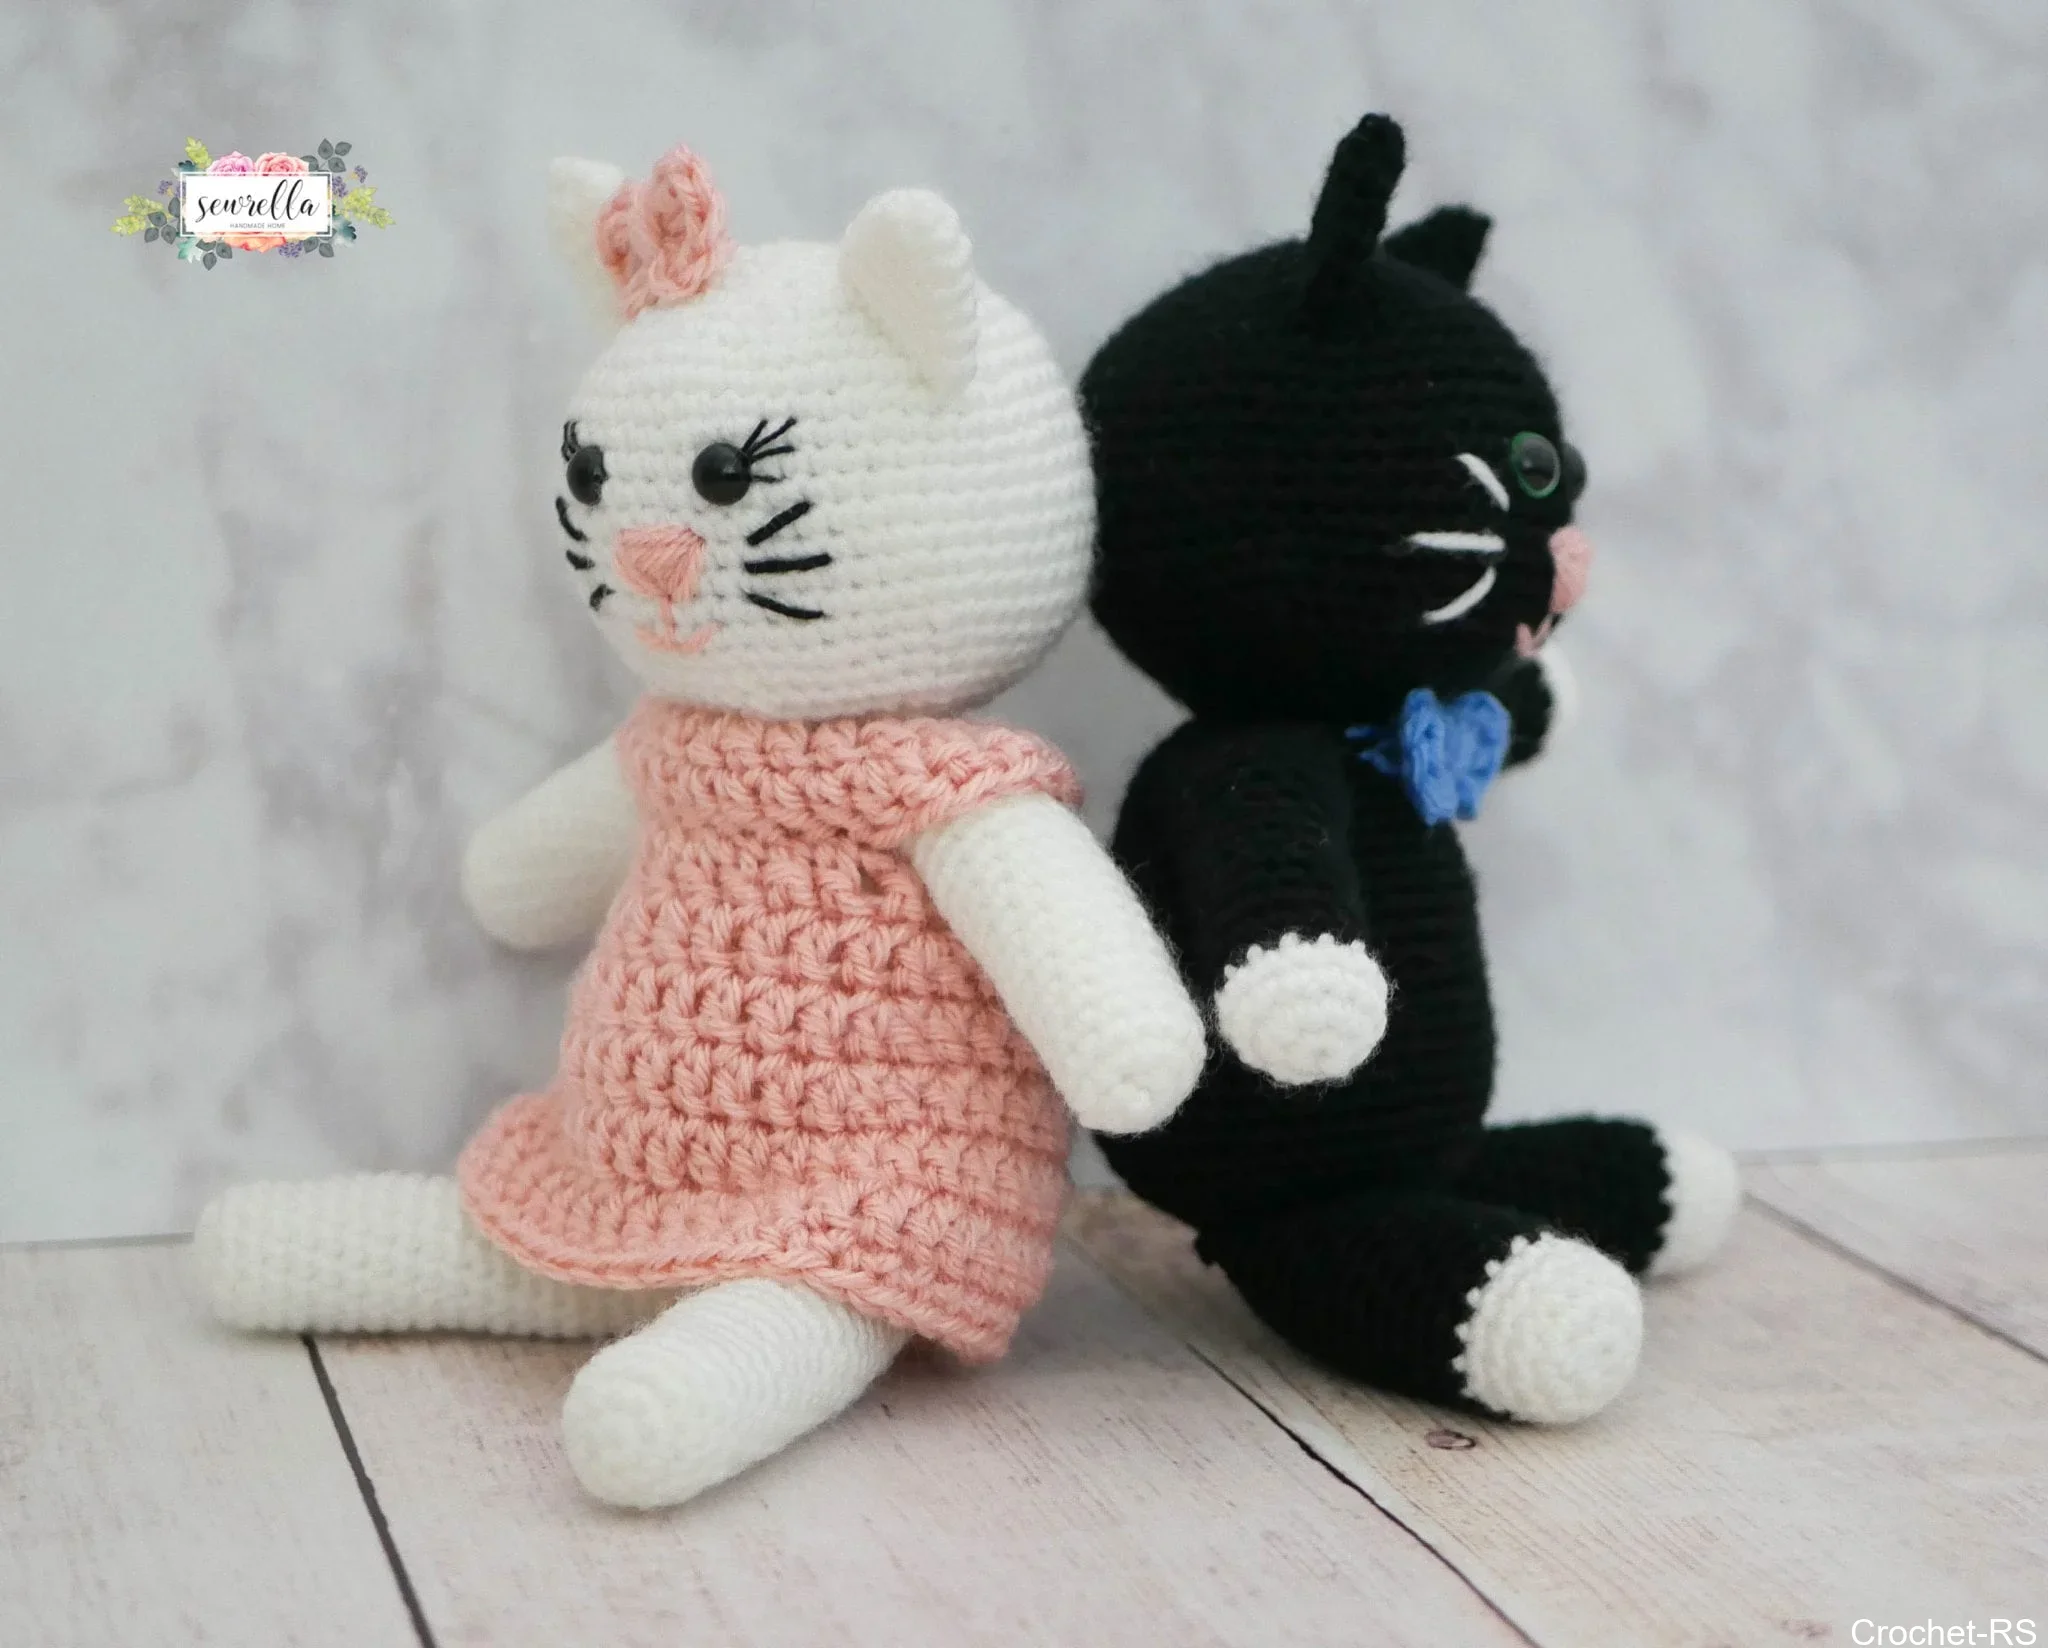
The neckline of your dress is done and should be as pictured.
*Note: We will create the body of the dress separately, then slip it on and sew to attach as pictured below after the arms are made.
Body of the dress
With an H hook and pink yarn, Ch 24, sl st to 1st Ch to form a ring, Ch 2, work 24 Dc inside the ring, sl st to join to the first Dc of the Round, Ch 2 (24)
Round 2: 2 Dc, Dc in next 5, repeat around, sl st to join, Ch 2 (28)
Round 3: 2 Dc, Dc in next 6, repeat around, sl st to join, Ch 2 (32)
Round 4: 2 Dc, Dc in next 7, repeat around, sl st to join, Ch 2 (36)
Round 5: 2 Dc, Dc in next 8, repeat around, sl st to join, Ch 2 (40)
Round 6: Dc in each around, sl st to join, Ch 2 (40)
*Note: To create a longer skirt than pictured, repeat Round 6 up to once or twice more
Round 7: Sc in each around, sl st to join (40)
Finish off and weave ends. Set aside and make the arms.
Arms
*Make 2
With B hook and white yarn, Make a magic ring, Ch 1, 6 Sc inside ring (6)
Round 2: 2 Sc in each around (12)
Round 3: Round 3: 2 Sc, Sc in next, repeat around (18)
-Begin stuffing with polyfil and stuff after each round until firm
Rounds 4-19: Sc in each around (18)
Finish off leaving a long tail.
Slip the body of the dress onto the kitty where it meets the neckline. Don’t attach yet.
Pinch the arms to sew up as pictured.
Slip the arm under the neckline and sew into place.
Lift the neckline to sew the arm down securely. Weave the end and sew on the other arm.
Now time to attach the body of the dress.
Thread the tapestry needle with the long end left from the neckline.
Starting at the back of the dress, whip stitch the pieces together until you reach the first arm.
Weave the yarn through the neckline stitches over the arm.
Continue whipstitching across the front of the dress. This will create perfectly fitted arm holes. Make sure not to make those arm holes too tight or loose.
Skip over the second arm the same way we did the first. Finish whipstitching the back of the dress until we are where we began.
Weave ends.
Legs
*Make 2
Make a magic ring, Ch 1, 6 Sc inside ring (6)
Round 2: 2 Sc in each around (12)
Round 3: Round 3: 2 Sc, Sc in next, repeat around (18)
-Begin stuffing with polyfil and stuff after each round until firm
Rounds 4-22: Sc in each around (18)
Finish off and pinch to sew up as pictured. Sew onto the bottom of the kitty.
Bow
With H hook and pink yarn, Ch 4, 3 Dc in 1st Ch (furthest from the hook), Ch 2, sl st into 1st foundation Ch (same as Dc), Ch 3, 3 Dc into 1st foundation Ch, Ch 2, sl st into 1st foundation Ch, finish off leaving a long tail.
Wrap the tail around the center of the bow 4 or 5 times, tie a knot with the slip knot tail, and sew next to the kitty’s ear.
Daddy Kitty
Follow the same pattern as Mama Kitty, with a few modifications.
Replace:
- all white yarn with black
- all black yarn with white (whiskers)
- pink bow with sky blue bow (same pattern) and sew onto the neck instead of the ear
- all B size hooks for D size hooks (head, body, ears, arms & legs)
- Black safety eyes with Green safety eyes
For arms & legs: Use white yarn for Rounds 1-4, change color to black yarn for Rounds 5-finish
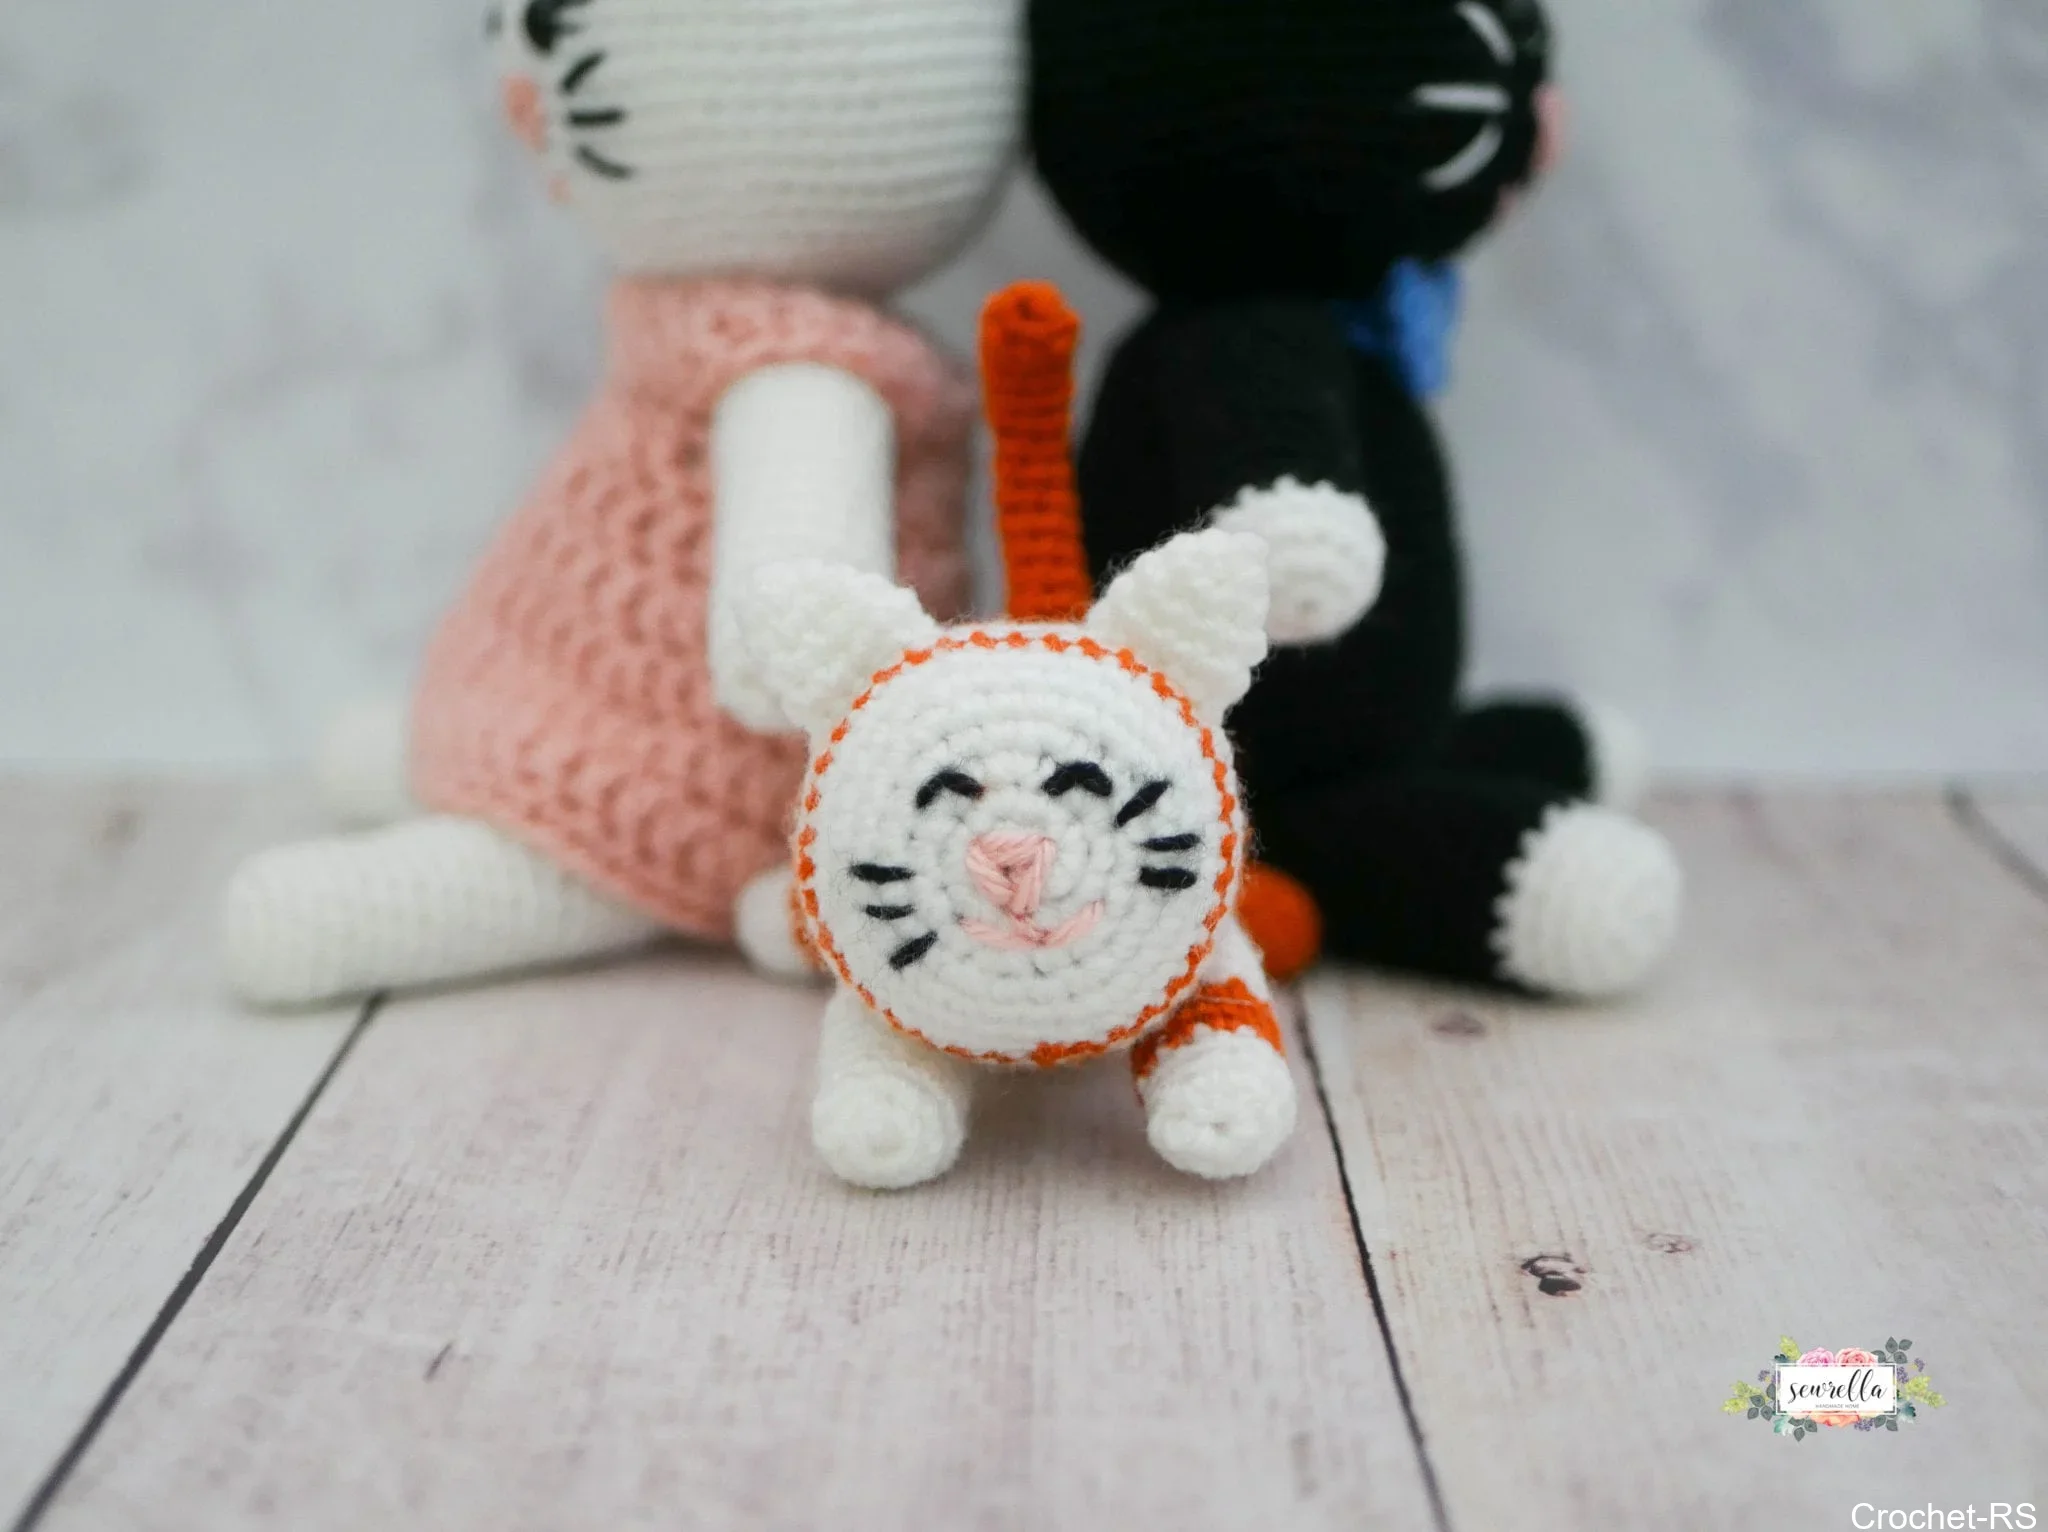
Baby Kitten
Head
With B hook and white yarn, make a magic ring, Ch 1, 6 Sc in ring (6)
Round 2: 2 Sc in each around (12)
Round 3: 2 Sc, Sc in next, repeat around (18)
Round 4: 2 Sc, Sc in next 2, repeat around (24)
Round 5: 2 Sc, Sc in next 5, repeat around (28)
Round 6: 2 Sc, Sc in next 6, repeat around (32)
Round 7: 2 Sc, Sc in next 7, repeat around (36)
-Change color to terracotta
Round 8: Sc in each around (36)
-Change color to white
Rounds 9-10: Sc in each around (36)
-Change color to terracotta
Rounds 11-12: Sc in each around (36)
-Embroider nose, smile, whiskers, and eyes over the white increasing Rounds
Round 13: Sc decrease, Sc in next 7, repeat around (32)
Round 14: Sc decrease, Sc in next 6, repeat around (28)
Round 15: Sc decrease, Sc in next 5, repeat around (24)
Round 16: Sc decrease, Sc in next 2, repeat around (18)
Round 17: Sc decrease, Sc in next, repeat around (12)
Finish off leaving a long tail, sew up the bottom of the head, and leave the long tail without weaving.
Ears
*Make 2
Same as Mama kitty ear pattern through Round 5.
Finish off, pinch ear to whip stitch up, and sew onto head between Rounds 9 & 10.
Body
Front arms:
*Make 2
*Note: I left one arm white and striped the other with 2 Rounds of Terracotta
With B hook and white yarn, make a magic ring, Ch 1, 6 Sc inside ring (6)
Round 2: 2 Sc, Sc in next, repeat around (9)
Rounds 3-10: Sc in each around (9)
Finish off 1st arm and weave ends, don’t finish off 2nd arm
Continuing from 2nd arm, Ch 6, join to next available st of 1st arm and Sc in each around 1st arm (all 9 Sc), Sc along the Ch 6, Sc around 2nd arm (all 9 Sc), Sc down other side of Ch 6 (30)
*We now have one complete Round to work the body from moving forward. Continue with the body without breaking yarn.
-Stuff the arms with polyfil until firm
Body:
Rounds 12-16: Sc in each around (30)
Round 17: 2 Sc, Sc in next 9, repeat around (33)
Round 18: Sc in each around
Round 19: 2 Sc, Sc in next 10, repeat around (36)
Rounds 20-25: Sc in each around (36)
Round 26: Sc decrease, Sc in next 4, repeat around (30)
Round 27: Sc decrease, Sc in next 3, repeat around (24)
-Begin stuffing with polyfil, continue to stuff until firm after each Round
Round 28: Sc decrease, Sc in next 2, repeat around (18)
Round 29: Sc decrease, Sc in next, repeat around (12)
Round 30: Sc decrease around (6)
Finish off and sew up the bottom of the body.
Sew the head to the body just where the front arms meet the body.
Back Legs
*Make 2
*Note: I left 1 leg terracotta, and striped the other leg with 2 Rounds of white
With B hook and terracotta yarn, make a magic ring, Ch 1, 6 Sc inside ring (6)
Round 2: 2 Sc, Sc in next, repeat around (9)
Rounds 3-10: Sc in each around (9)
Finish off and weave ends, sew onto the body around Rounds 25-27.
Tail
With B hook and terracotta yarn, make a magic ring, Ch 1, 6 Sc inside ring (6)
Rounds 2-15: Sc in each around (6)
Finish off.
Optional: Cut a piece of pipe cleaner to size and insert into the tail. This makes your tail hold its shape better. No need to stuff the tail.
Sew onto the top of the Kitten’s bottom.
Don’t forget to Pin this project to your Pinterest boards!
What amigurumi animals do you want to see next? Comment below!
[wprm-recipe id=”2448″]