Atta Boy Vest for Baby Free Crochet Pattern
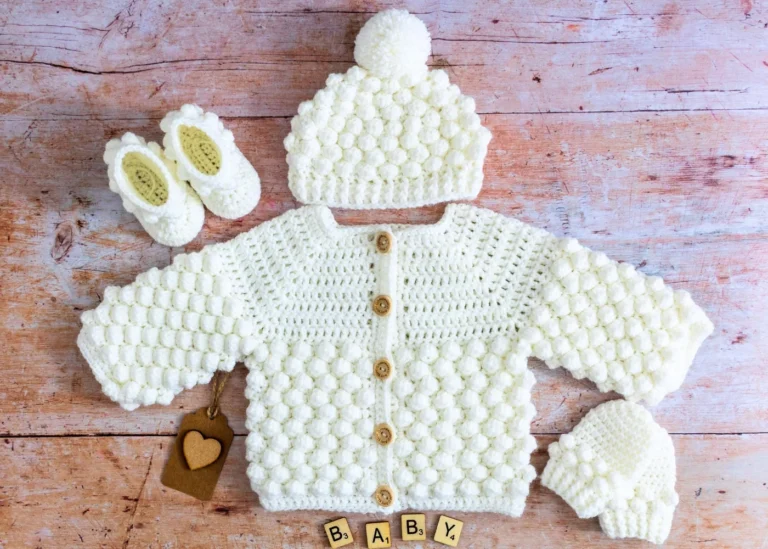
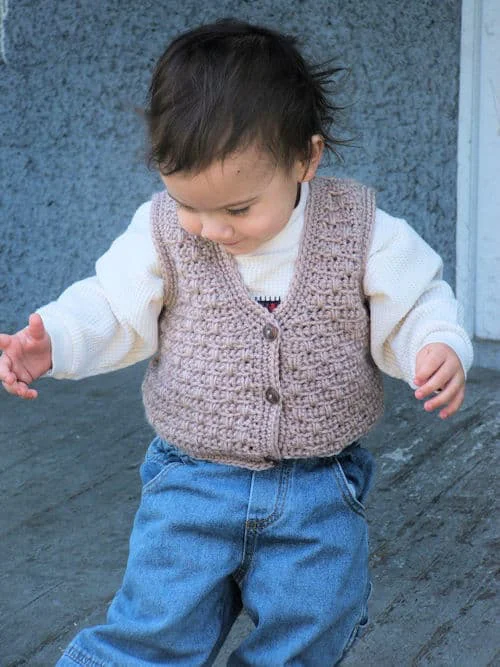
Welcome back to another delightful crochet project! Today, we have an absolutely charming, wonderfully handsome, and incredibly cozy pattern for the littlest ones in your life: the Atta Boy Baby Vest! If you love crafting sweet nursery accessories that perfectly capture classic handmade charm while offering a beautifully tailored, sophisticated design to keep baby warm during smart occasions or chilly playdates, this brilliant little vest is going to be your next favorite make.
This fantastic baby vest pattern is wonderfully adaptable and perfect for unforgettable handmade baby shower gifts, allowing you to whip up beautiful, lovable baby garments in no time that will keep baby snug and be cherished as a family keepsake for years! While the instructions highlight a specific beautiful, classic look, you can easily adjust the color variations depending on the worsted weight yarn used—swap out classic navies or grays for magical pastels, bright pinks, or vibrant bold hues to create a whimsical, personalized baby accessory! Grab your hooks, settle into your favorite crafting spot, and let’s dive into making this wonderfully stylish, cozy little vest!
Finished Sizes
9 months (with sizes 12 months and 18 months in parentheses) When there is only one instruction or one number, it is the same for all sizes.
Finished Chest Measurements
22″ (24″, 26″)
Materials
- Plymouth Yarn Encore Worsted, 200 yds per 100g,
2 skeins required, shown in Taupe - Crochet Hook Sizes J-6mm (larger hook) and I-5.5mm (smaller hook) or sizes needed to meet gauge
- Yarn needle
- 3 size 5/8″ buttons
- Stitch markers (or small pieces of scrap yarn)
Gauge
13 stitches for 19 rows, worked in stitch pattern with larger hook, measures equals 4″ square.
Special Stitches
Long Single Crochet (LongSc): Skip two rows, insert hook from front of work to back of work in corresponding single crochet in next row after the two skipped rows, yarn over, pull loop through and pull it up sufficiently to the height of current row, yarn over, pull through two loops on hook.
Single Crochet Two Together (sc2tog): Insert hook in stitch indicated, yarn over, pull loop through, insert hook in next stitch, yarn over, pull loop through, yarn over, pull through three loops on hook.
Notes
Rows completed When the pattern indicates to work until a certain number of rows have been completed from beginning, the beginning indicates the very first row of that piece of the garment; i.e., the row where you did the initial foundation chain (the very beginning row).
Shaping When pattern states to “maintain stitch pattern”, you will adjust the instructions as necessary to accommodate the increase or decrease while keeping the same look that has already been established.
If the last stitch of a row gets a bit loopy, work that stitch under both loops instead of only one.
Hook sizes are stated in Materials. “Larger” hook is used throughout body of vest and “smaller” hook is used for trim only.
Crochet Pattern Instructions
Stitch Patterns
There are subtle differences between these two stitch patterns. The instructions will indicate which one will be used to establish the texture. It is based on the number of stitches stated for the size you are making. This happens when the stitch pattern measures wider than the measurement of the size changes.
Stitch Pattern 1
Row 1: Sk first ch, sc in each ch across, turn.
Rows 2-3: Ch 1, sc in front lps only across, turn.
Row 4 (RS): Ch 1, *sc in front lps only of next 3 sc, LongSc (see Special Stitches above), rep from * to last 3 sc, sc in front lps only of last 3 sc, turn.
Row 5: Ch 1, sc in front lps only across, turn.
Row 6: Ch 1, sc in front lp of next sc, *LongSc, sc in front lps only of next 3 sc, rep from * to last 2 sc, LongSc, sc in last sc, turn.
Row 7: Ch 1, sc in front lps only across, turn.
Rep Rows 4-7 for pattern.
Stitch Pattern 2
Row 1: Sk first ch, sc in each ch across, turn.
Rows 2-3: Ch 1, sc in front lps only across, turn.
Row 4 (RS): Ch 1, sc in front lps only of next 4 sc, *LongSc (see Special Stitches above), sc in front lps only of next 3 sc, rep from * to last 5 sc, LongSc, sc in front lps only of last 4 sc, turn.
Row 5: Ch 1, sc in front lps only across, turn.
Row 6: Ch 1, sc in front lps only of next 2 sc, *LongSc, sc in front lps only of next 3 sc, rep from * to last 3 sc, LongSc, sc in front lps only of last 2 sc, turn.
Row 7: Ch 1, sc in front lps only across, turn.
Rep Rows 4-7 for pattern.
Back
With larger hook, ch 38 (40, 44).
Work in Stitch Pattern 2 (1, 1) until a total of 20 (22, 24) rows have been completed from beginning: 37 (39, 43) sts.
Armhole
Continue maintaining stitch pattern throughout.
Sl st across 3 (4, 4) sts, work across to last 3 (4, 4) stitches, turn, leaving remaining sts unworked: 31 (31, 35) sts.
Next row: Ch 1, sc2tog, work across to last 2 sts, sc2tog, turn: 29 (29, 33) sts.
Rep previous row once more: 27 (27, 31) sts.
Work in established stitch pattern on these 27 (27, 31) sts until 40 (44, 48) rows have been completed from beginning.
Shoulder
Ch 1, work across 5 (6, 6) sc only, turn, leaving remaining sts unworked.
Next row: Ch 1, sc2tog, work across, fasten off: 4 (5, 5) sts.
Opposite Shoulder
Count across 5 (6, 6) sts from opposite armhole side, attach yarn with sl st, ch 1, work across 5 (6, 6) sts only, turn.
Next row: Ch 1, work across to last 2 sts, sc2tog, fasten off: 4 (5, 5) sts.
First Front
With larger hook, ch 18 (20, 22).
Work in Stitch Pattern 2 (1, 2) until a total of 20 (22, 24) rows have been completed from beginning: 17 (19, 21) sts.
Armhole and Neckline Shaping
Continue maintaining stitch pattern throughout.
Sl st across 3 (4, 4) sts, work across to last 2 sts, sc2tog, turn: 13 (14, 16) sts.
Next row: Ch 1, sc2tog, work across to last 2 sts, sc2tog, turn: 11 (12, 14) sts.
Next row: Ch 1, work across, turn: 11 (12, 14) sts.
Next row: Ch 1, work across WITH sc2tog at neck edge only: 10 (11, 13) sts.
Rep previous 2 rows 6 (6, 8) times more.
Continue on these 4 (5, 5) sts until 42 (46, 50) rows completed from beginning, fasten off.
Second Front
With larger hook, ch 18 (20, 22).
Work in Stitch Pattern 2 (1, 2) until a total of 20 (22, 24) rows have been completed from beginning: 17 (19, 21) sts.
Armhole and Neckline Shaping
Continue maintaining stitch pattern throughout.
Ch 1, sc2tog, work across to last 3 (4, 4) sts, turn, leaving remaining sts unworked: 13 (14, 16) sts.
Next row: Ch 1, sc2tog, work across to last 2 sts, sc2tog, turn: 11 (12, 14) sts.
Next row: Ch 1, work across, turn: 11 (12, 14) sts.
Next row: Ch 1, work across WITH sc2tog at neck edge only: 10 (11, 13) sts.
Rep previous 2 rows 6 (6, 8) times more.
Continue on these 4 (5, 5) sts until 42 (46, 50) rows completed from beginning, fasten off.
Finishing
With yarn needle, seam shoulders and sides.
Button Band
With smaller hook, join with sl st at bottom of vest at either side seam, ch 1, sc evenly around entire garment including bottom, inner fronts and neckline, sl st to first sc. Do not cut off. Mark positions for 3 evenly-spaced buttons. Ch 1, sc in each sc around, except at button positions, work: ch 2, sk 1 sc, sl st to first sc. Ch 1, sc in each sc around, except at ch-2 sps of buttonholes, work: 1 sc in each ch-2 sp, sl st to first sc, cut off. With sewing needle, attach buttons corresponding to buttonholes.
Sleeve Trim
With smaller hook, join with sl st at bottom of armhole at seam, ch 1, sc evenly around bottom of armhole, sl st to first sc. Ch 1, sc in each sc around, sl st to first sc, fasten off. Repeat for opposite armhole.