Crochet Happy Monkey
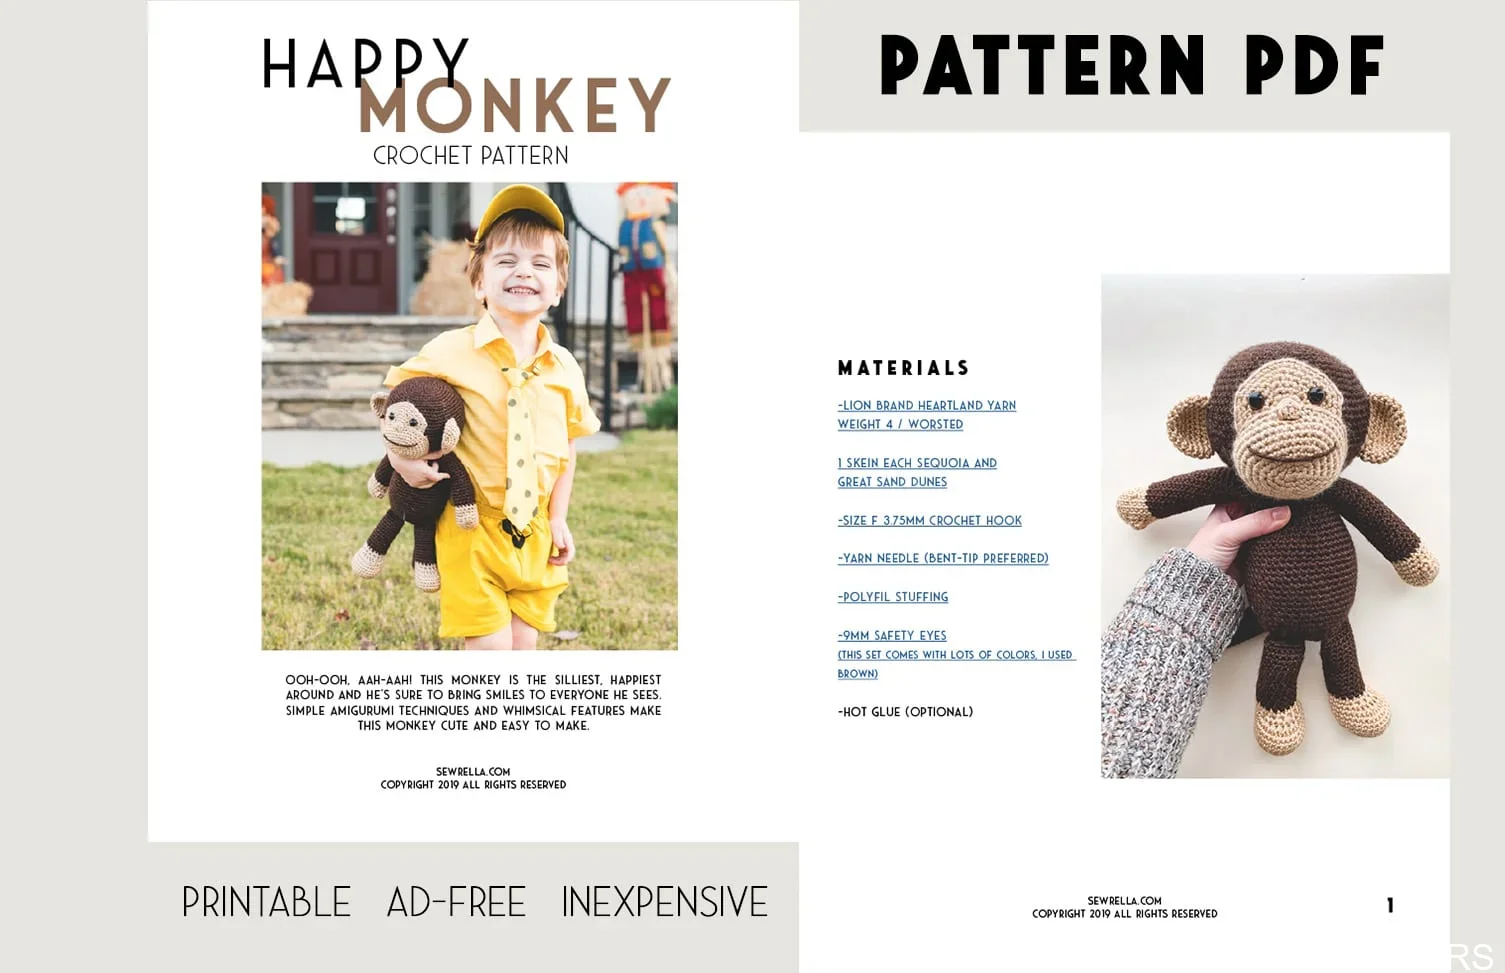
The latest free pattern here on the blog –theCrochet Happy Monkey!
Read below about the inspiration, the perfect yarn I chose, the DIY Halloween costume for kiddos, or scroll on down for thefree pattern, video and photo tutorial.
The Inspiration + Design
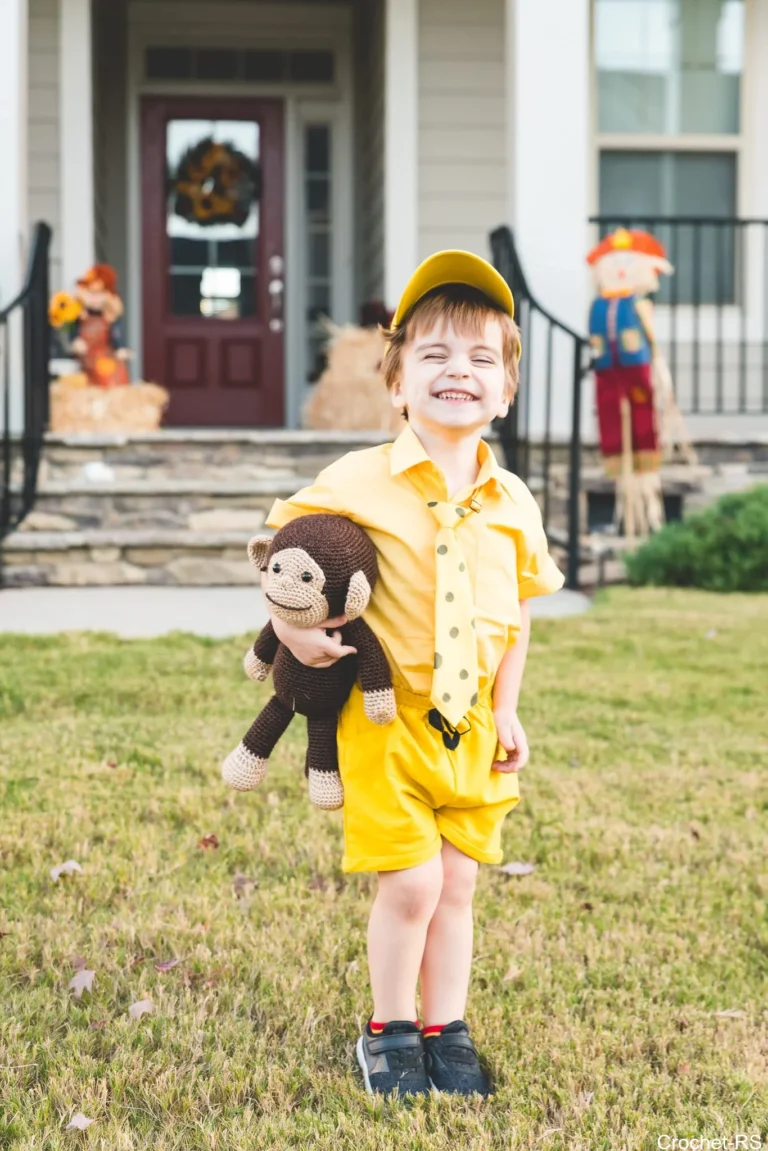
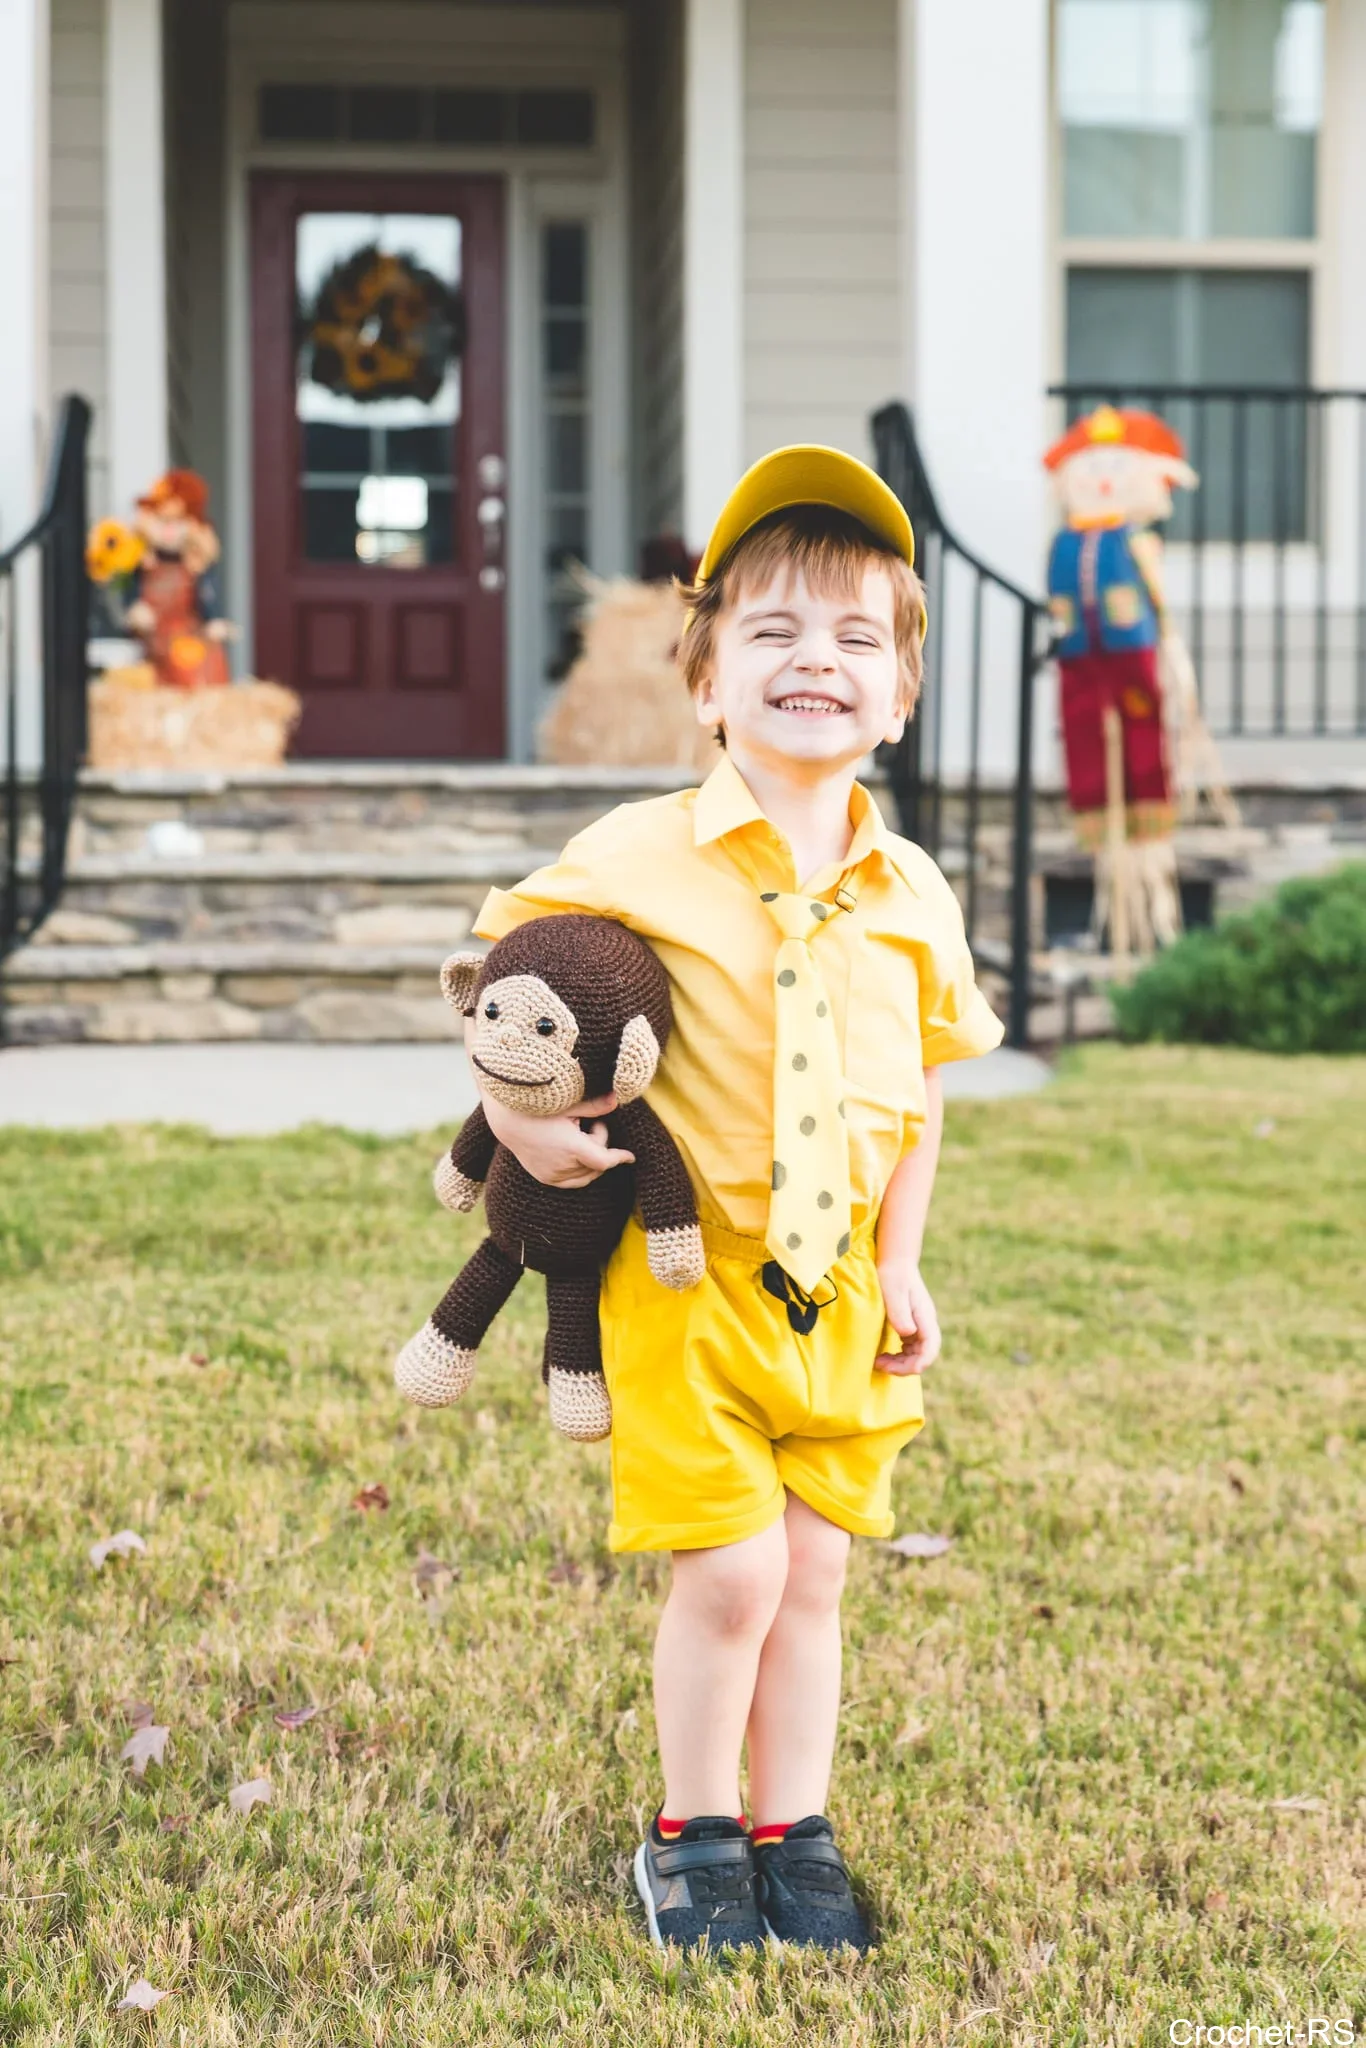
My three year old Parker is obsessed with Curious George – the books, the movie, everything. So when I thought about Halloween coming up, I thought surprising him with a fun costume would be just the thing!
I’ll be dressing Parker up as The Man with the Yellow Hat and he will carry around a monkey! Of course, I could just buy a plush monkey and call it a day but where’s the fun in that? I knew stitching up a monkey in the amigurumi style of toy making would be perfect!
This makes it such a special piece for his first Halloween costume (he didn’t dress up the last couple of years) and he can keep the monkey around to play or sleep with beyond just Halloween! Which means all my hard work making this little guy will be so worth it.
The Yarn
I knew I wanted to use a worsted weight yarn for this project because I love the way worsted works up in amigurumi. Due to using a small hook size to get a dense, tight fabric I didn’t want to use a light weight yarn that would take longer and I didn’t want to use a bulky yarn that would create more gaps between the large stitches.
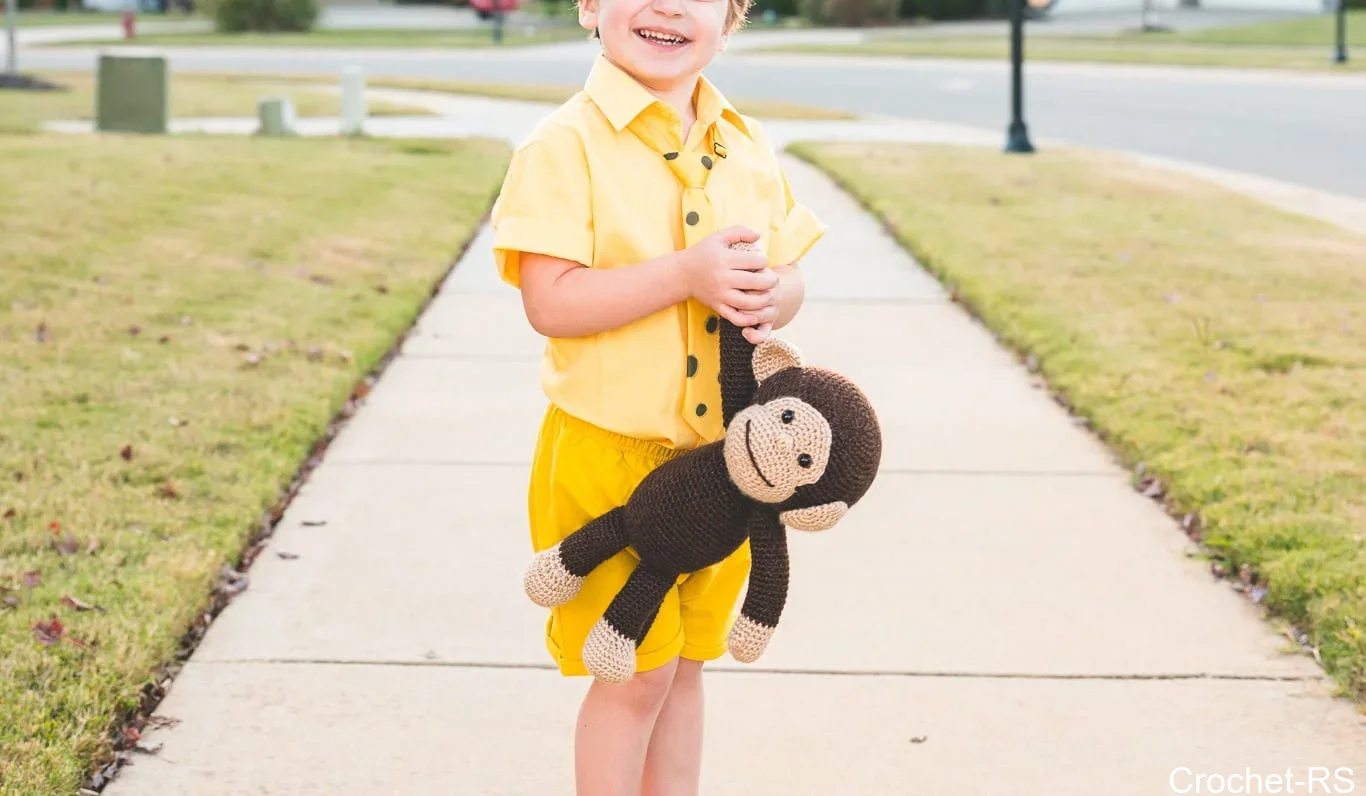
I choseLion Brand Heartlandbecause of the color range and theheatheredlook that this yarn line presents! I love more dimensional yarns like this for all projects (they’re just more interesting to me) but especially for amigurumi as they look more like the actual variation of real animals. At least a little bit 😉
This happy monkey pattern only took one skein ofeach color yarn! I had about half the ball of the lighter color leftover too – such great bang for your buck!

PATTERN
- Get the ad-free, large print, printable PDF patternHERE.
- Grab the Ultimate Pattern Bundle that includes 150+ patterns just like this one on sale for $20 todayHERE.
- PIN this pattern to your Pinterest boards for laterHERE.
- Add this pattern to your Ravelry queueHERE.
DESCRIPTION
Ooh-ooh, aah-aah! This monkey is the silliest, happiest around and he’s sure to bring smiles to everyone he sees. Simple amigurumi techniques and whimsical features make this monkey cute and easy to make.
MATERIALS
–Lion Brand Heartland Yarn
Weight 4 / worsted
1 skein eachSequoiaandGreat Sand Dunes
–Size F 3.75mm crochet hook
–Yarn needle (bent-tip preferred)
–Polyfil stuffing
–9mm safety eyes(this set comes with lots of colors, I used brown)
-Hot glue (optional)
NOTES
Finished size:
17 x 10”
-Yarn substitutions can include any yarn that is a category 4 worsted weight yarn. brands and colors may vary.
-Add embellishments like bowties, hair bows, or flowers.
-Pieces are worked separately (with the exception of the head/body which are worked as one piece) and sewn together to finish.
-Numbers listed within indicate final stitch counts for that round.
-When the pattern reads “sc 2” this means to sc one time in each of the next two stitches.
-When the pattern reads “4 sc” this means to sc four times in the next stitch only.
-When the pattern reads “3 inc” this means to increase (2 sc in the same stitch) in each of the next three stitches.
-Work in unjoined rounds (a spiral) unless otherwise directed.
CROCHET HAPPY MONKEY
Face
In “Great Sand Dunes” yarn
Make a magic ring
Rnd 1: 6 sc in ring Rnd 2: Inc around Rnd 3: Inc, sc; rep around Rnd 4: Inc, Sc 2; rep around Rnd 5: Inc, Sc 3; rep around Rnd 6: Inc, Sc 4; rep around Rnd 7: Inc, Sc 5; rep around Rnd 8: Inc, Sc 6; rep around
Insert safety eyes between rounds 5 & 6 with 9 sts between them. Do not place backs.
Finish off leaving a long tail for sewing. Weave magic ring end. Set aside.
Snout
In “Great Sand Dunes” yarn
Make a magic ring
Rnd 1: 6 sc in ring Rnd 2: 4 sc, sc 2, 4 sc, sc 2 Rnd 3: Sc, 3 inc, sc 3, 3 inc, sc 2 Rnd 4: Sc 2, 3 inc, sc 6, 3 inc, sc 4 Rnd 5: Sc 3, [inc, sc] 3 times, sc 6, [inc, sc] 3 times, sc 3 Rnd 6: Sc 4, [inc, sc] 3 times, sc 9, [inc, sc] 3 times, sc 5 Rnd 7: Sc 6, [inc, sc 2] 3 times, sc 9, [inc, sc 2] 3 times, sc 3 Rnds 8-10: sc around
Finish off leaving a long tail for sewing. Weave magic ring end. Set aside.
Head / Body (one piece)
In “Sequoia” yarn
Make a magic ring
Rnd 1: 6 sc in ring Rnd 2: Inc around Rnd 3: Inc, sc; rep around Rnd 4: Inc, Sc 2; rep around Rnd 5: Inc, Sc 3; rep around Rnd 6: Inc, Sc 4; rep around Rnd 7: Inc, Sc 5; rep around Rnd 8: Sc around Rnd 9: Inc, sc 6; rep around Rnd 10: Inc, Sc 7; rep around Rnd 11: Sc around Rnd 12: Inc, Sc 8; rep around Rnd 13: Inc, Sc 9; rep around Rnds 14-22: Sc around
Place safety eye backs (while attached to face) between Rnds 15 & 16 with 9 sts between them. Place backs securely. Safety eyes are now anchored through both pieces.
Begin stuffing with polyfil stuffing and continue stuffing after each round until firm.
Rnd: 23: Dec, sc 9; rep around Rnd: 24: Dec, sc 8; rep around Rnd: 25: Dec, sc 7; rep around Rnd: 26: Dec, sc 6; rep around Rnd: 27: Dec, sc 5; rep around Rnd: 28: Dec, sc 4; rep around Rnd: 29: Dec, sc 3; rep around Rnd 30: Dec, sc 2; rep around Rnd 31: Sc around Rnd 32: Inc, sc 2; rep around Rnd 33: Inc, sc 3; rep around Rnd 34: Inc, sc 4; rep around Rnd 35: Inc, sc 5; rep around Rnd 36: Inc, sc 6; rep around Rnds 37-42: Sc around
Begin stuffing with polyfil stuffing and continue stuffing after each round until firm.
Rnd 43: Dec, sc 6; rep around Rnds 44-45: Sc around Rnd 46: Dec, sc 5; rep around Rnds 47-48: Sc around Rnd 49: Dec, sc 4; rep around Rnds 50-51: Sc around Rnd 52: Dec, sc 3; rep aroundRnd 53: Dec, sc 2; rep around Rnd 54: Dec, sc; rep around
Finish off and sew opening closed by whip stitching through the front loop of each stitch of the last round.
Arms*make 2
In “Great Sand Dunes” yarn
Make a magic ring
Rnd 1: 6 sc in ring Rnd 2: Inc around Rnd 3: Sc around Rnd 4: Inc, sc Rnd 5: Sc around Rnd 6: Sc 4, 4 dc, sc next 13 Rnd 7: Sc 4, 2 dec, sc next 13 Rnd 8: Dec, sc 4; rep around, sc in last st Rnds 9-10: Sc around
Change color to “Sequoia”
Rnds 11-31: Sc around
Weave magic ring end. Stuff with polyfil stuffing until firm.
Flatten the arm and work the next round through both layers to close.
Rnd 32: Sc across
Finish off leaving a long tail for sewing. Set aside.
Legs*make 2
In “Great Sand Dunes” yarn
Make a magic ring
Rnd 1: 6 sc in ring Rnd 2: inc around Rnd 3: inc, sc; rep around Rnd 4: Inc, Sc 2; rep around Rnd 5: Inc, Sc 3; rep around Rnds 6-9: sc around Rnd 10: sc 9, 6 dec, sc 9 Rnd 11: sc 6, 6 dec, sc 6 Rnd 12: sc around
Change color to “Sequoia”
Rnds 13-17: sc around Rnd 18: dec, sc 16 Rnds 19-20: sc around Rnd 21: dec, sc 15 Rnds 22-23: sc around Rnd 24: dec, sc 14 Rnds 25-26: sc around Rnd 27: dec, sc 13
Weave magic ring end. Stuff with polyfil stuffing until firm.
Flatten the leg and work the next round through both layers to close.
Rnd 27: Sc across
Finish off leaving a long tail for sewing. Set aside.
Ears*make 2
In “Great Sand Dunes” yarn
Make a magic ring
Rnd 1: 6 sc in ring Rnd 2: Inc around Rnd 3: Inc, sc; rep around Rnd 4: Inc, Sc 2; rep around Rnds 5-7: Sc around Rnd 8: Dec, sc 2; rep around
Finish off leaving a long tail for sewing. Weave magic ring end. Set aside.
Nose
In “Great Sand Dunes” yarn
Make a magic ring
Rnd 1: 5 sc in ring
Finish off leaving a long tail for sewing. Weave magic ring end as best you can on the back of the nose stitches. Set aside.
Tail
In “Sequoia” yarn
Make a magic ring
Rnd 1: 6 sc in ring Rnd 2: Inc around Rnds 3-25: Sc around
Flatten the tail and work the next round through both layers to close.
Rnd 26: Sc across
Finish off leaving a long tail for sewing. Set aside.
Assembly
View the real-time video tutorial on assembly here.
Sew around the edge of the face piece to secure to the head.
Sew snout centered on the face just below the eyes.
Sew nose over last Rnd of Snout (the nose should overlap the face just a bit).
Sew ears on either side of the head. Top of ear should align with the eyes – between Rnds 15 & 16 of the head. Count 8 sts over from the edge of the face and begin sewing.
Sew other ear in the same fashion.
Sew arms on either side of the body right at the neck. Arm placement should line up with the ears.
Sew legs on either side of the bottom body. Sew each leg at a slight angle toward the front center body.
Sew tail at back of the bottom body along Rnd 50 of the body.
With a spare piece of “Sequoia” yarn embroider a smile with the lowest part at Row 1 of the Snout and the highest part between Rnds 6 & 7 of the Snout. Use hot glue to secure in place if you desire.
ABBREVIATIONS
ch – chaindc – double crochetdec – decrease /sc 2 togetherinc – increase / 2 screp – repeatrnd – roundsc – single crochet
OTHERFREECROCHET KIDS PATTERNSYOU MIGHT LOVE
- Crochet Frankenstein Trick-or-Treat Bag/ 2.Crochet Little Lamb Lovey/ 3.Crochet Pumpkin Trick-or-Treat Bag
[wprm-recipe id=”2442″]